12 Stunning Gallery Wall Ideas
Key Takeaways
What are gallery wall ideas, exactly? They are planned arrangements of framed art, photos, and objects hung together as one display — from strict grids to free-form salon clusters — that turn an empty wall into a styled focal point in any room.
Which layout is the easiest to get right? The grid. Identical frames with even spacing (about 2 inches apart) look polished even with simple prints, because symmetry does the heavy lifting for you.
Can renters hang a gallery wall without drilling? Yes. Adhesive picture-hanging strips, hook-and-loop fasteners, and picture ledges hold lightweight frames securely and remove cleanly, so no drill or patching is needed.
What holds a gallery wall together visually? One repeating element — a frame color, a mat color, a subject theme, or a color palette — keeps mixed pieces feeling intentional instead of cluttered.
Table of Contents
- Gallery Wall Ideas for Every Room
- What Is the Best Gallery Wall Layout for Beginners?
- Gallery Wall Layouts Compared
- How Much Space Should I Leave Between Frames?
- 1. Precision Grid in Matching Black Frames
- 2. Salon-Style Cluster in Gold and Jewel Tones
- 3. Horizontal Linear Run Above a Sofa
- 4. Single-Column Gallery for Narrow Walls
- 5. Layered Picture-Ledge Shelf Display
- 6. Anchor-Piece Cluster Around One Oversized Artwork
- 7. Monochrome Photography Grid
- 8. Family Photo Hallway Timeline
- 9. Rotating Kids’ Art Display
- 10. Petite Bathroom Gallery Wall
- 11. Oversized Anchor Above a Headboard
- 12. Renter-Friendly No-Drill Gallery Wall
- Frequently Asked Questions
- Conclusion
Gallery Wall Ideas for Every Room
Gallery wall ideas are one of the fastest ways to make a room feel finished, because a thoughtfully arranged group of frames fills a blank wall with personality, color, and story all at once. Whether you want a crisp grid above a console or a free-flowing salon cluster around a sofa, the trick is planning the layout before you pick up the hammer.
A gallery wall works in almost any space: living rooms, hallways, staircases, bedrooms, dining rooms, and even bathrooms. Before you start, measure your wall and cut paper templates the size of each frame — taping them up lets you test the arrangement with zero commitment. The dining room wall decor ideas on this site are a great companion read if your gallery wall is going near the dining table, since the same balance and spacing rules apply.
Keep one element consistent across your frames — the frame color, the mat color, or the subject matter — and the whole wall will look curated rather than chaotic. The twelve gallery wall ideas below each include a concrete example so you can picture exactly how it comes together.
What Is the Best Gallery Wall Layout for Beginners?
The grid is the best gallery wall layout for beginners: identical frames in straight rows with even 2-inch spacing create a polished, gallery-like look, because the symmetry keeps every piece aligned and forgiving even if your prints are simple.
Gallery Wall Layouts Compared
Most gallery walls fall into six classic layouts. Use this table to match a layout to your wall, your art, and your confidence level before you start hanging.
| Layout | Best for | How it looks | Skill level |
|---|---|---|---|
| Grid | Formal rooms, matching prints, consoles | Identical frames in straight rows and columns | Easy |
| Salon | Eclectic collections, big blank walls | Organic, floor-to-near-ceiling mix of sizes and shapes | Hard |
| Linear | Hallways, above sofas and sideboards | One long horizontal row, evenly spaced | Easy |
| Column | Narrow walls, staircases, between windows | Frames stacked in a single vertical line | Easy |
| Ledge | Renters, seasonal swaps, layered art | Frames leaning on shallow floating shelves | Easy |
| Anchor | Mixed art around one statement piece | One large artwork with smaller frames orbiting it | Medium |
How Much Space Should I Leave Between Frames?
Leave 2 to 3 inches between frames for a tight, cohesive gallery wall, or 4 to 5 inches for a looser, airier feel. Consistency matters more than the exact number — uneven gaps are what make a wall look messy, not wide ones.
1. Precision Grid in Matching Black Frames
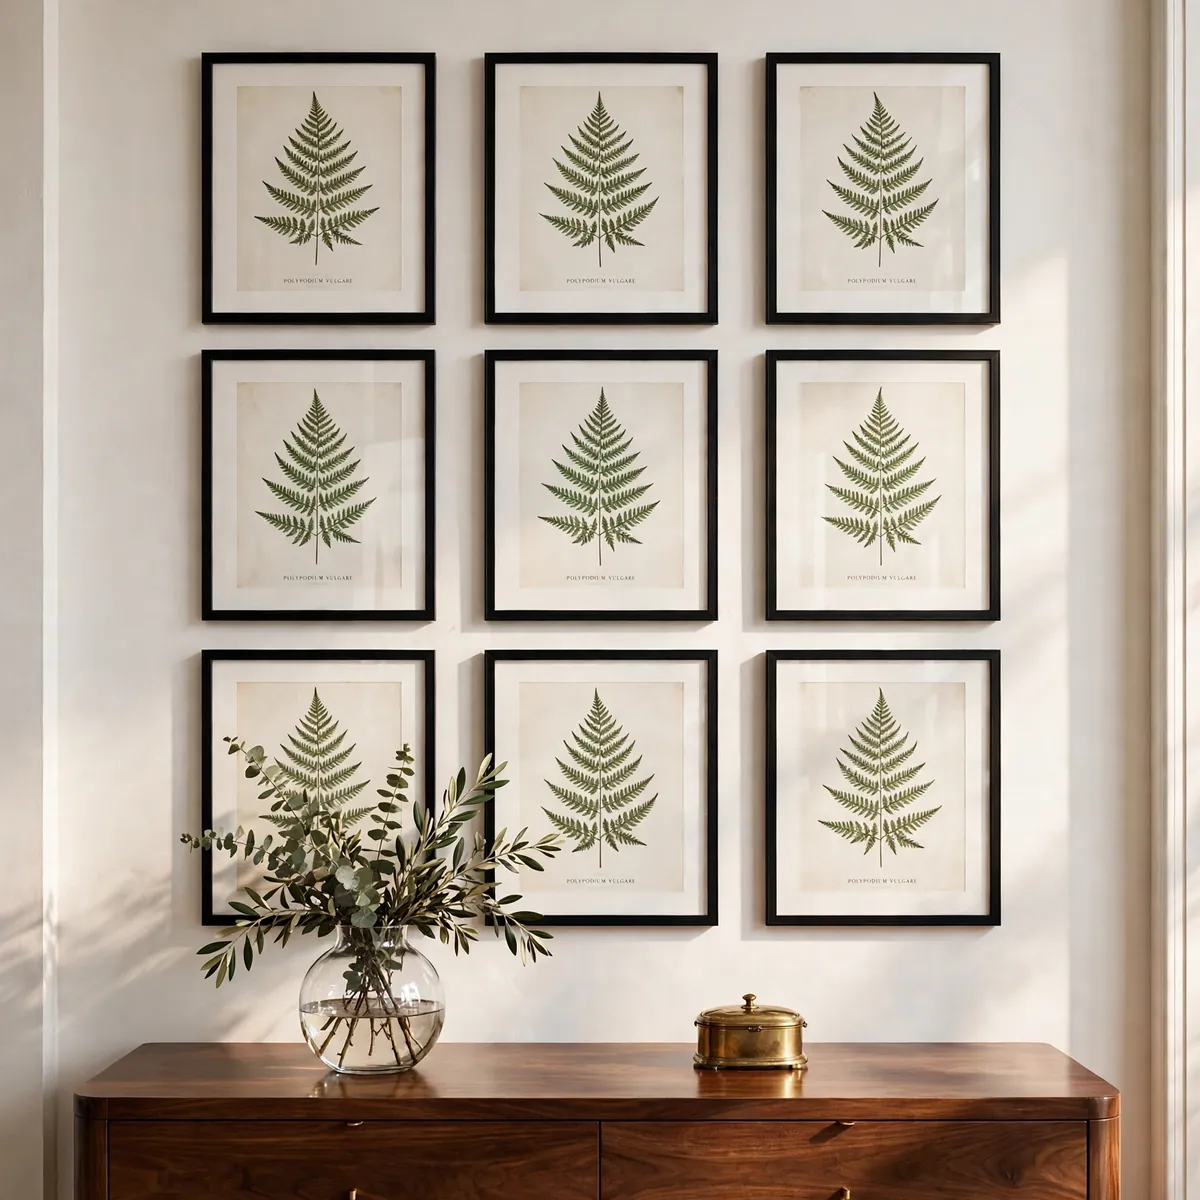
Start with the layout that never fails: nine 8×10 botanical prints in identical thin black frames, spaced exactly 2 inches apart, forming a neat 3×3 grid above a walnut console table.
The uniform frames turn simple affordable prints into something that looks museum-caliber, and the walnut console grounds the arrangement so it reads as one composed vignette rather than floating art.
Quick tips:
- Buy all frames in one go so the profile and finish match exactly.
- Use a level and painter’s tape to mark the outer corners of the grid before hanging.
- Hang the center frame first, then work outward.
2. Salon-Style Cluster in Gold and Jewel Tones
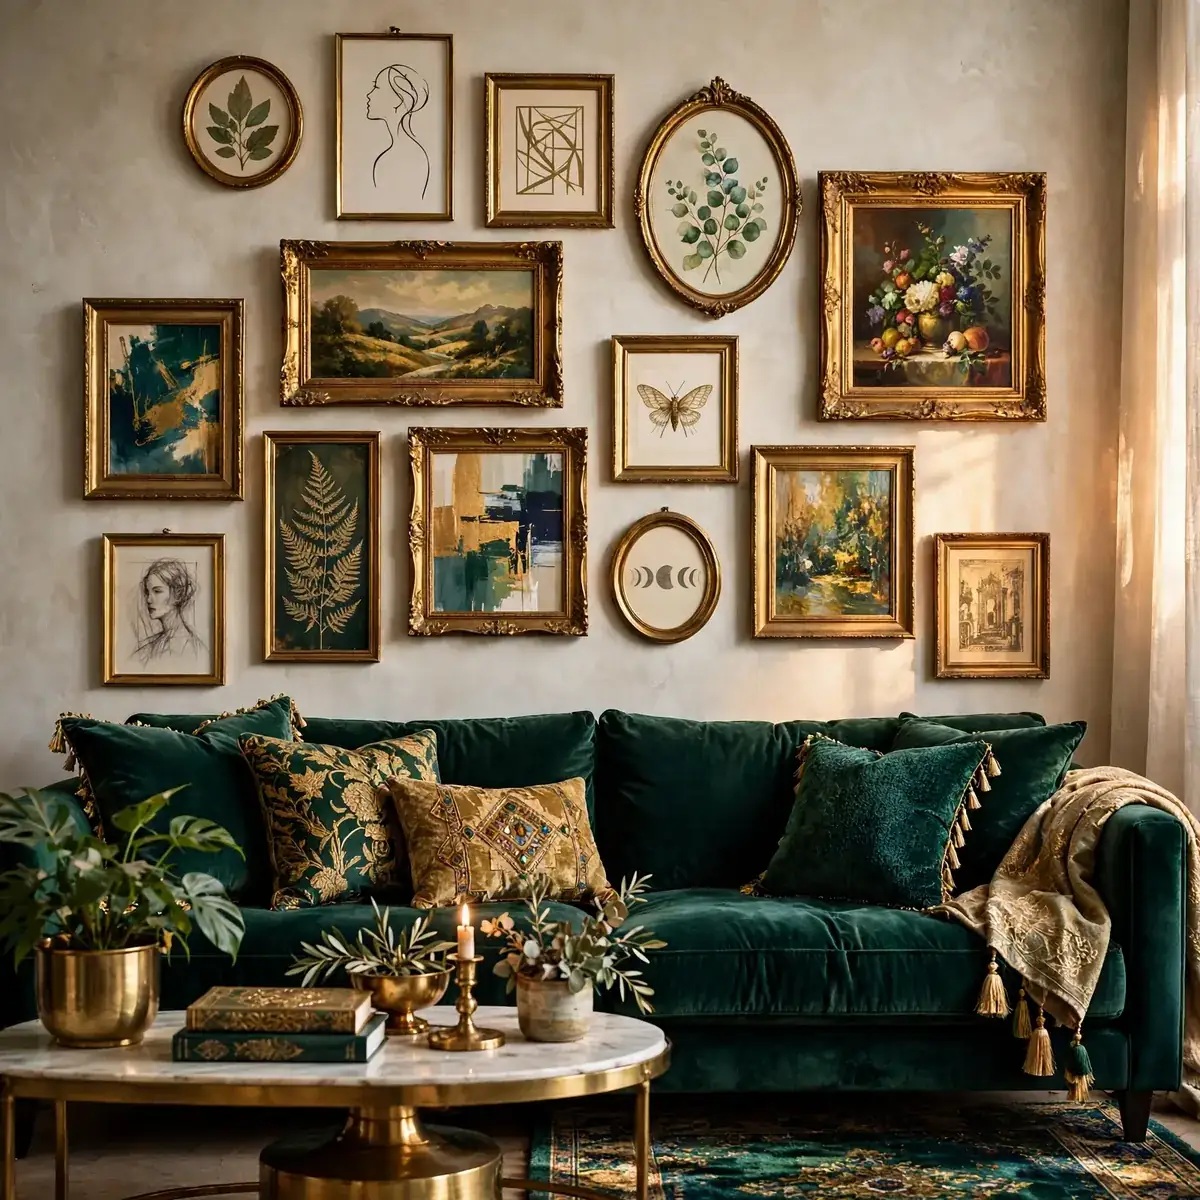
Go bold with a salon-style cluster: fifteen or more pieces — oil-style prints, a small round mirror, a vintage portrait — in mixed brass and gold frames, flowing organically across the wall above an emerald velvet sofa.
Salon walls look spontaneous, but they need planning. Lay every piece on the floor first and shuffle until the arrangement feels balanced, then take a photo as your hanging map. The jewel-toned sofa gives the busy wall a rich backdrop that makes the gold frames glow.
Quick tips:
- Start hanging from the largest piece at the center and build outward.
- Mix frame sizes but keep one or two finishes dominant.
- Leave the arrangement 6 to 8 inches above the sofa back.
3. Horizontal Linear Run Above a Sofa
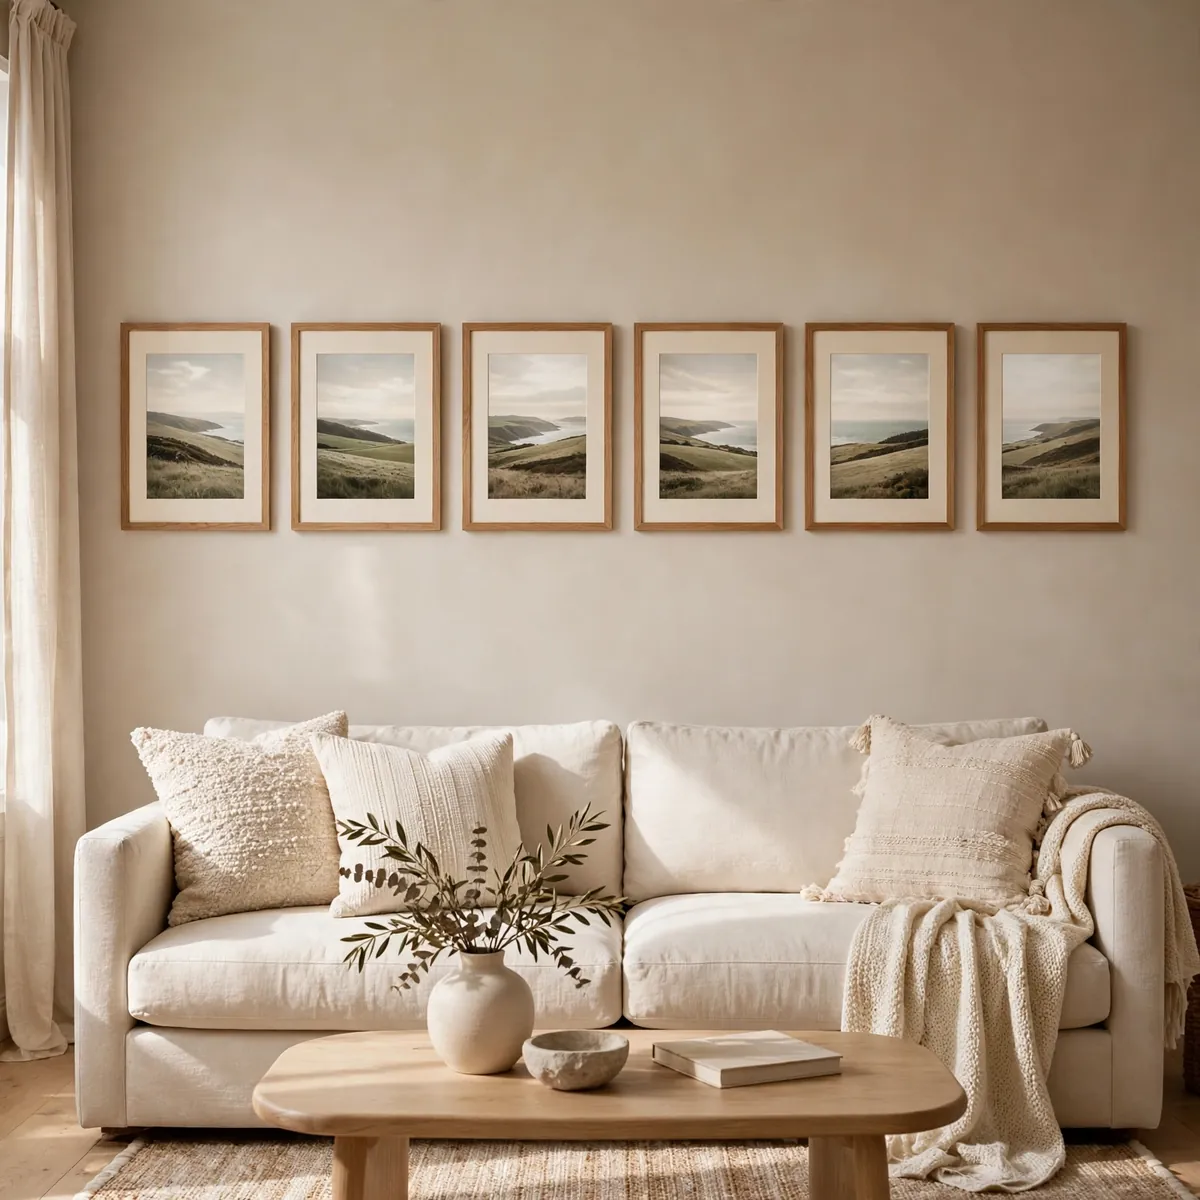
For long walls, run a single horizontal line: six matching 11×14 landscape prints in natural oak frames with cream linen mats, hung in one straight row 8 inches above a cream sofa.
Linear arrangements pull the eye along the wall, making narrow living rooms feel wider. The shared mat color is what makes differently themed prints look like a set.
Quick tips:
- Keep the row’s total width to about two-thirds of the sofa’s length.
- Use a laser level or taut string so the row stays perfectly straight.
- Hang at eye level — the row’s center should sit around 57 to 60 inches from the floor.
4. Single-Column Gallery for Narrow Walls
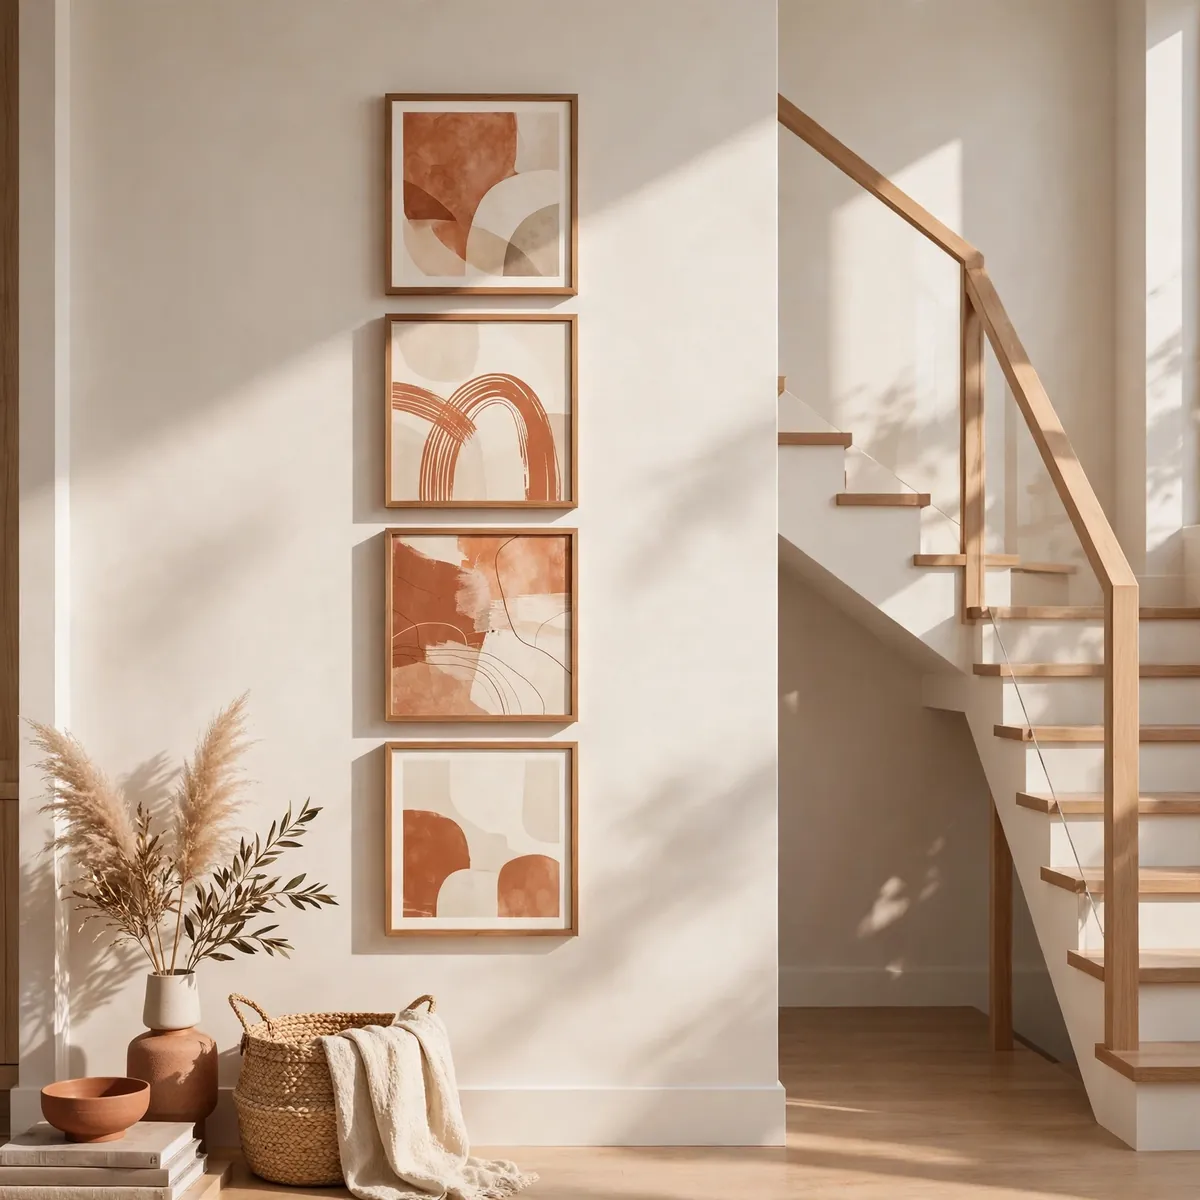
Turn an awkward narrow strip into a feature: four 12×12 square prints in a warm terracotta-and-cream palette, stacked in a single vertical column up the staircase wall.
A column works where nothing else fits — between windows, beside doorways, or along a stair incline, where you simply follow the angle of the stairs with your stacking.
Quick tips:
- Keep every frame the same width so the column reads as one unit.
- On staircases, space frames to echo the stair’s slope.
- Three to five frames is the sweet spot; fewer looks sparse, more gets cramped.
5. Layered Picture-Ledge Shelf Display
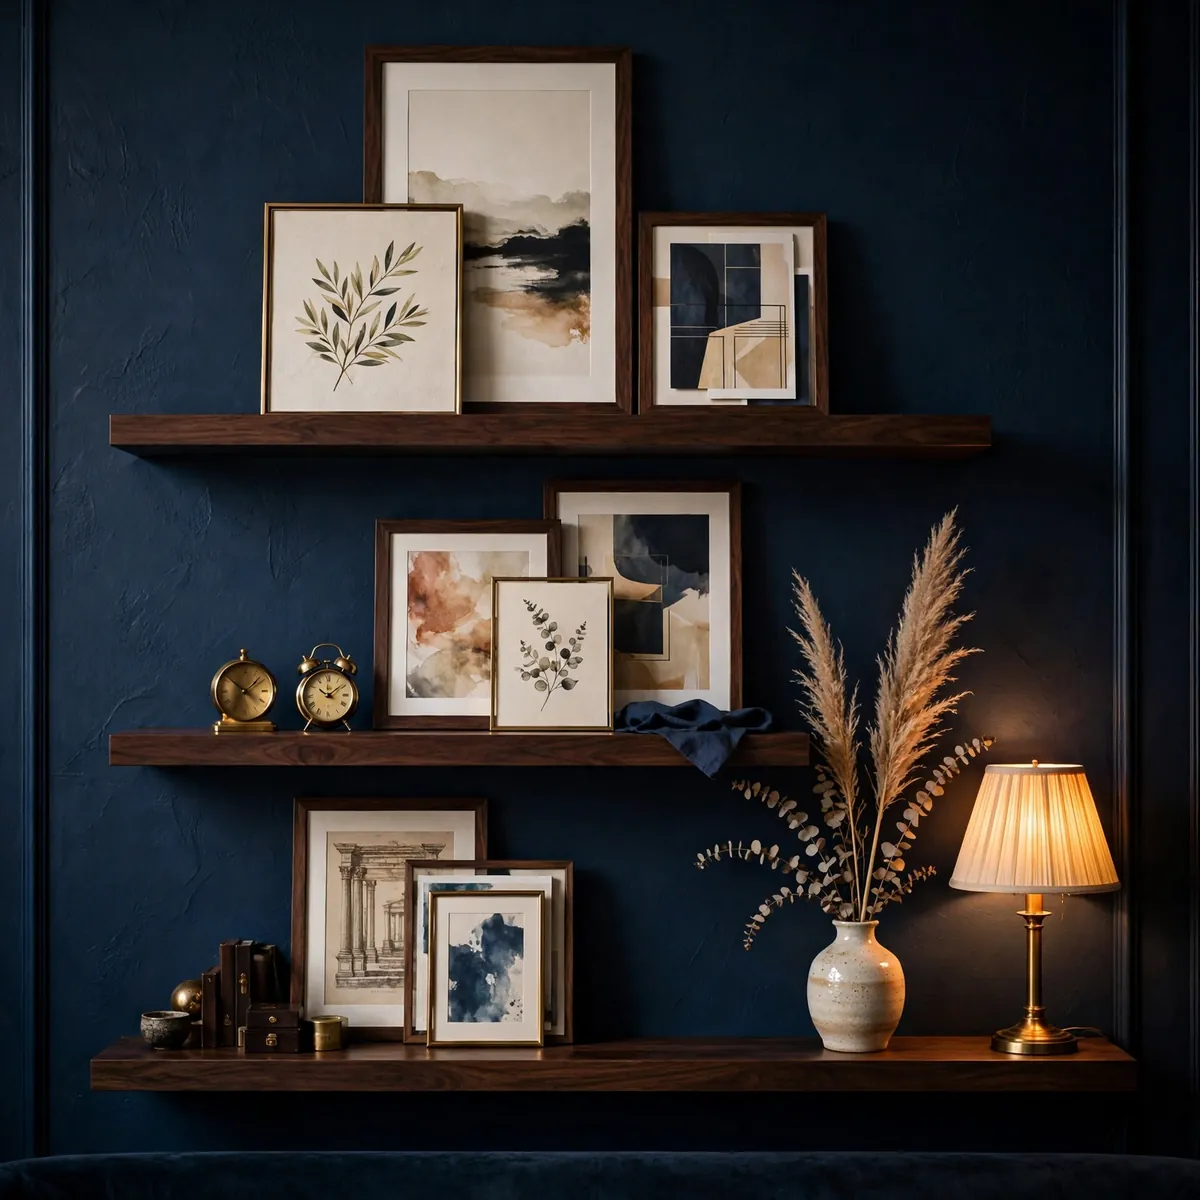
Mount three 36-inch walnut picture ledges on a navy accent wall and layer framed prints, a small brass clock, and a ceramic vase along them — taller pieces at the back, smaller ones overlapping in front.
Picture ledges are the easiest gallery wall of all: no measuring grid, no patching when you change your mind. Just lean, overlap, and swap pieces with the seasons.
Quick tips:
- Space shelves 12 to 18 inches apart so frames don’t bump the shelf above.
- Overlap frames slightly for a collected, layered look.
- Mix one or two 3D objects per shelf so it doesn’t read as a store display.
6. Anchor-Piece Cluster Around One Oversized Artwork
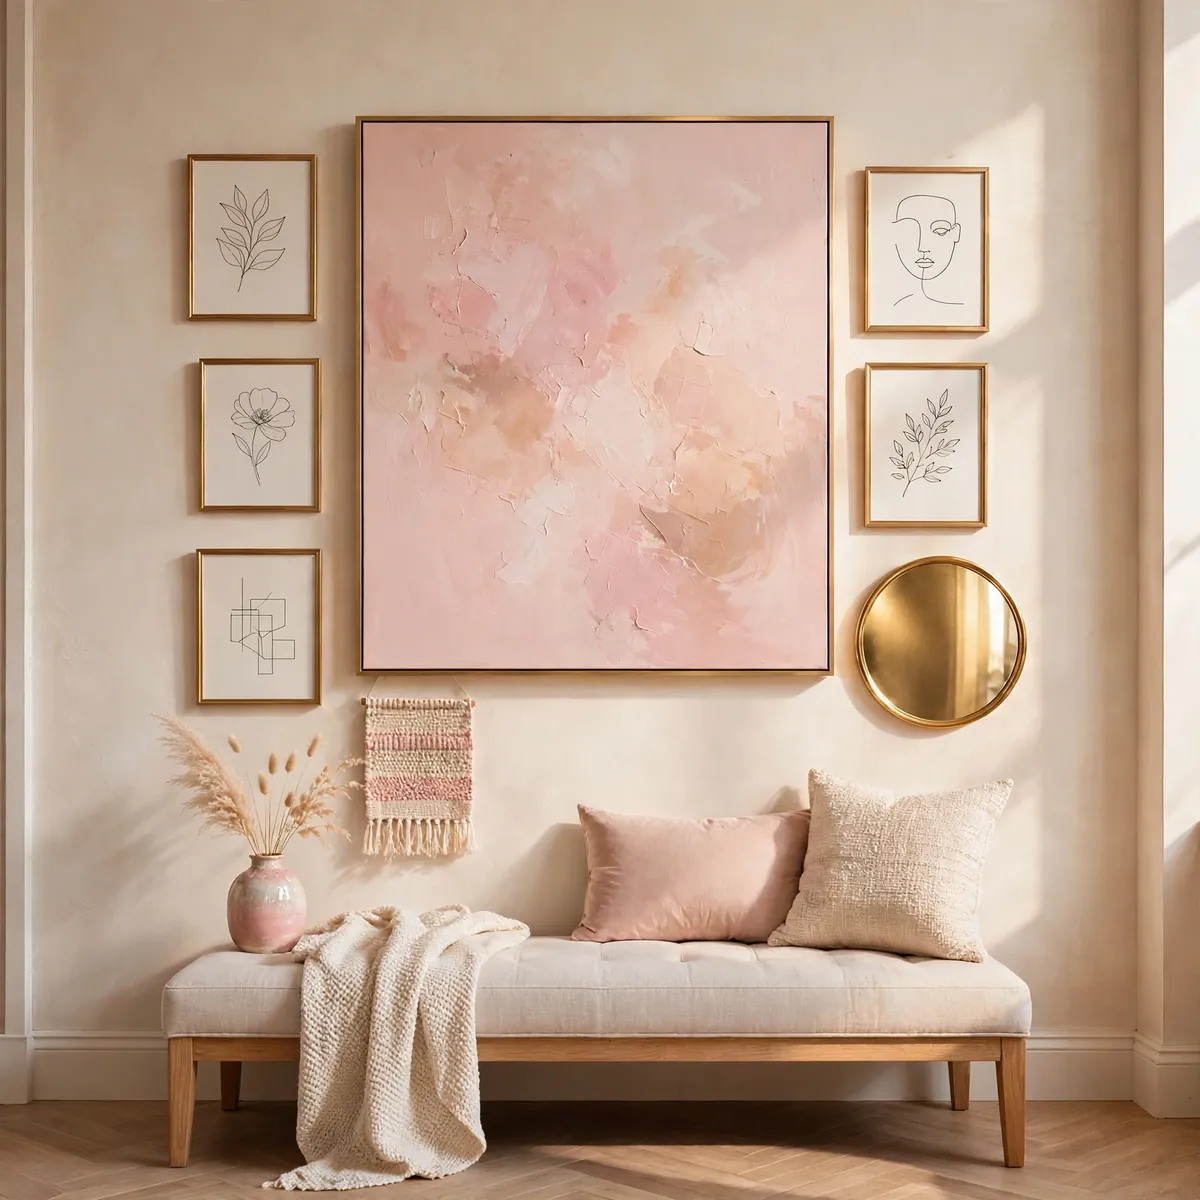
Build around one hero: a 36×48 blush abstract canvas centered on the wall, surrounded by six smaller pieces — gold-framed line drawings, a round mirror, a small textile — arranged like an orbit.
The anchor gives the cluster its center of gravity, so the surrounding pieces can be mismatched without looking random. Keep the anchor’s palette echoed in at least two smaller pieces to tie everything together.
Quick tips:
- Leave 3 to 4 inches between the anchor and the orbiting pieces.
- Hang the anchor at eye level, then build around it.
- Include one mirror or metallic piece to bounce light into the cluster.
7. Monochrome Photography Grid
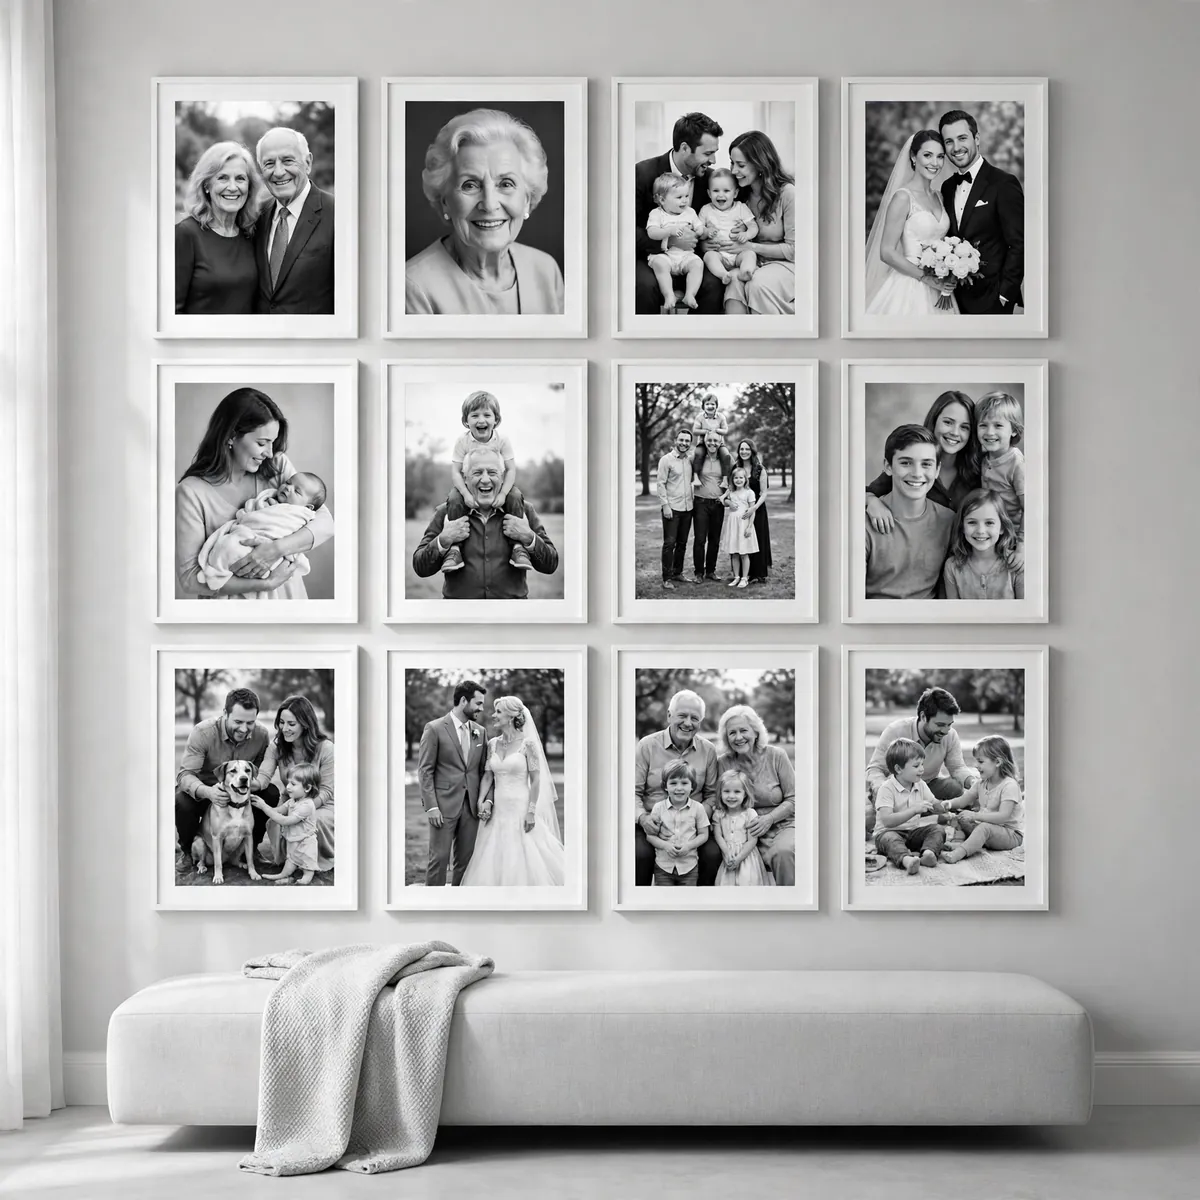
Print your twelve favorite black-and-white family photos at the same 8×10 size and hang them in thin white frames in a 4×3 grid on a light gray wall.
Stripping the color from photos unifies totally different subjects — vacations, portraits, pets — into one calm, elegant wall. Thin white frames keep the look light and modern rather than heavy.
Quick tips:
- Convert photos to black and white with consistent contrast before printing.
- White mats inside the frames add breathing room and polish.
- This layout works beautifully above a bed, a desk, or a piano.
8. Family Photo Hallway Timeline
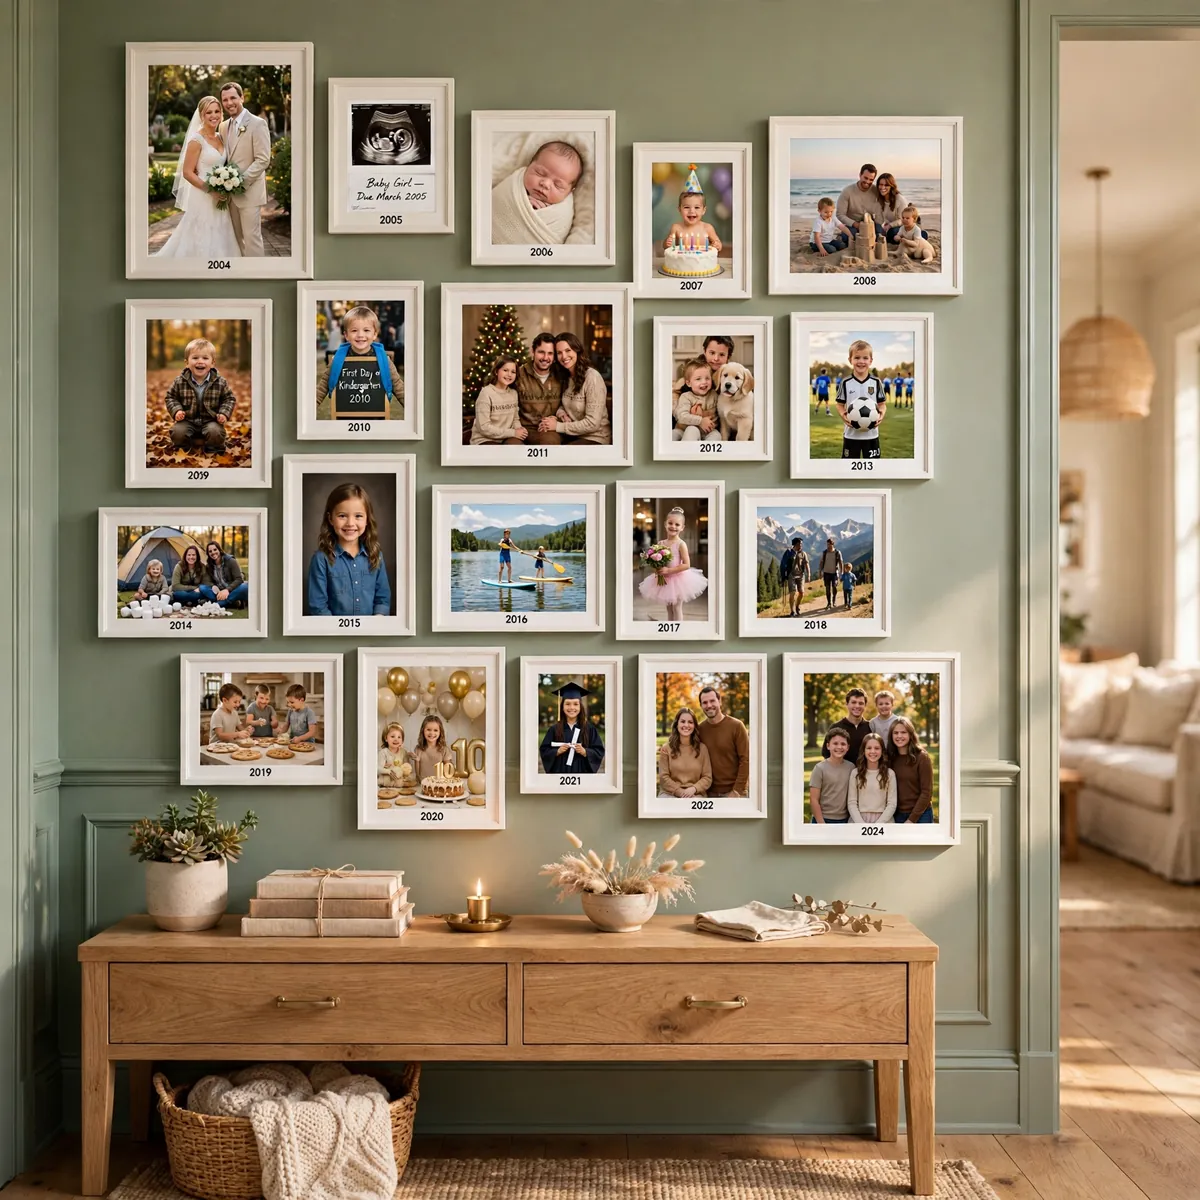
Line a hallway with a photo timeline: twenty framed family moments in white oak frames of mixed sizes, running chronologically from oldest at the hall entrance to the newest by the bedrooms, against a sage green wall.
Hallways are the most underused walls in the house, and a timeline turns a pass-through space into a story. Mixed frame sizes keep a long run from feeling monotonous.
Quick tips:
- Keep one finish (white oak) consistent so mixed sizes still feel unified.
- Center the run at eye level, roughly 57 inches from the floor.
- Leave a few gaps for future photos so the timeline can grow.
9. Rotating Kids’ Art Display
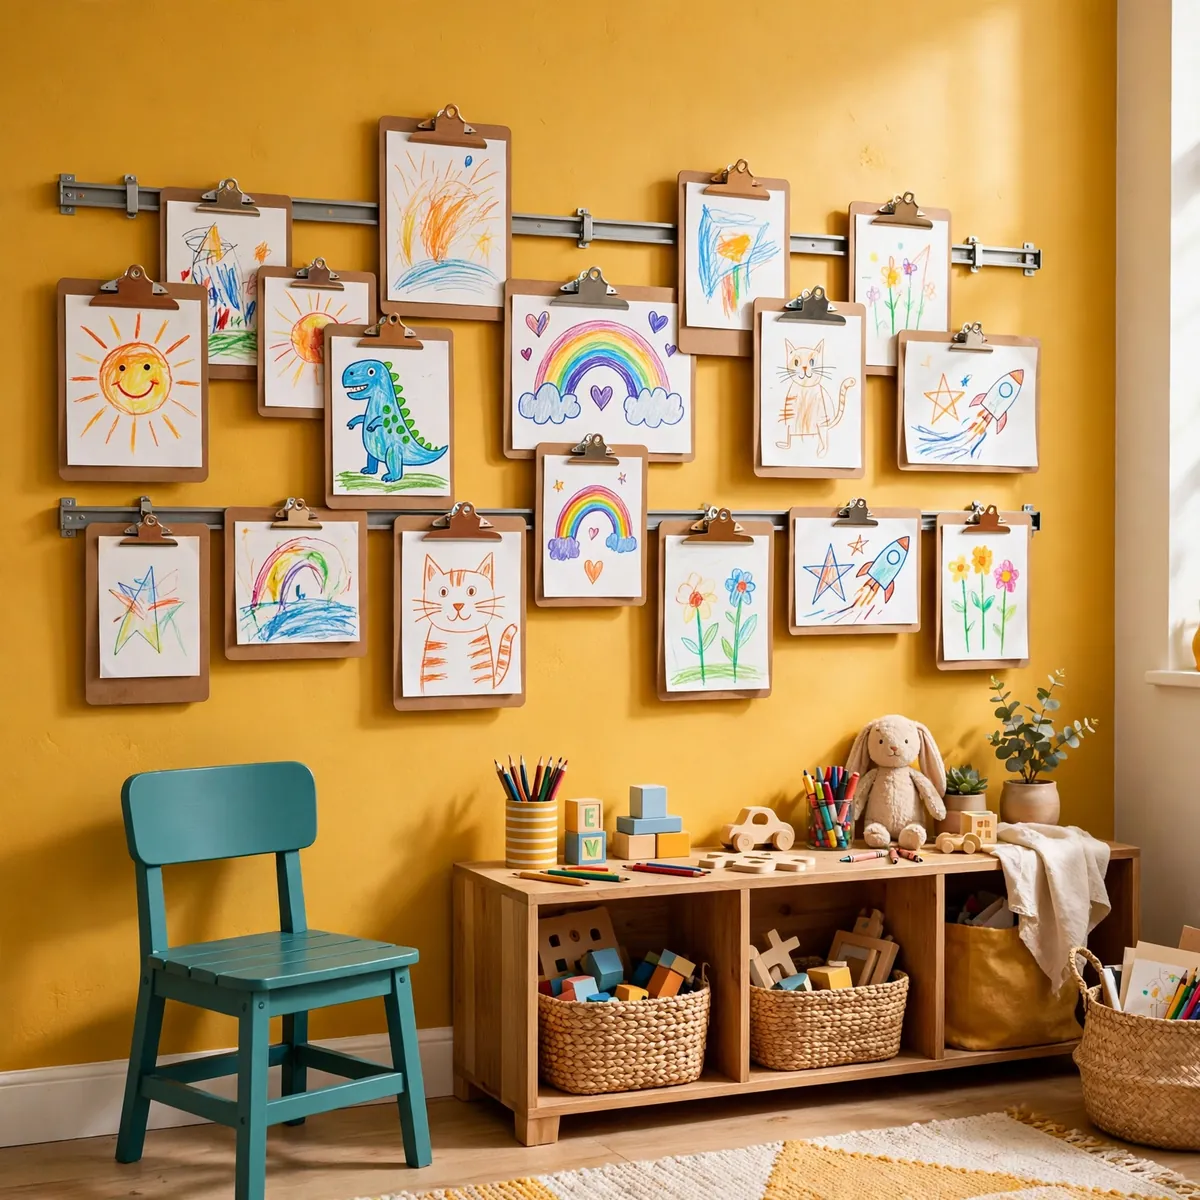
Give kids’ masterpieces a gallery of their own: mount six cork-backed clipboards and two clip rails on the wall of a mustard-and-teal kids’ room, and rotate fresh drawings through them every few weeks.
A rotating display celebrates creativity without turning the fridge into the family museum, and kids love seeing their art “exhibited.” Washi tape borders on the clipboards add color for pennies.
Quick tips:
- Keep the display at kids’ eye level so they can swap art themselves.
- Photograph each batch before rotating so nothing precious is lost.
- Use clip rails or clipboards rather than frames — nothing behind glass to break.
10. Petite Bathroom Gallery Wall
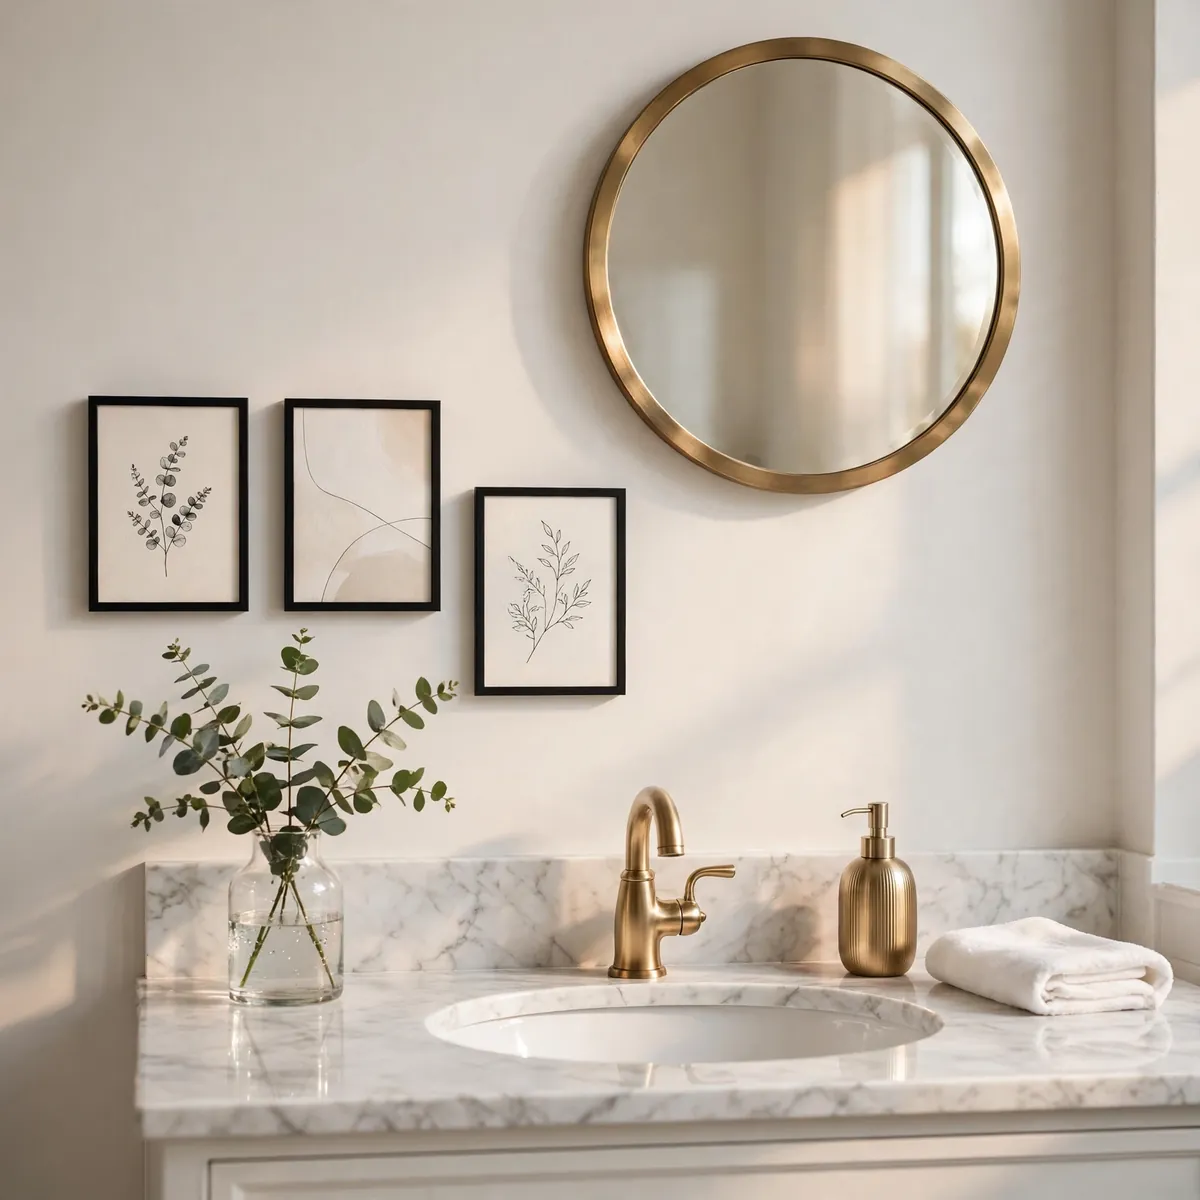
Don’t skip the bathroom: above a marble vanity, hang three small 5×7 prints — a botanical sketch, an abstract wash, a vintage perfume ad — in slim black frames alongside a 14-inch round mirror with a brushed brass rim.
Small-scale art suits small rooms, and humidity-proof frames (sealed backs, glass fronts) keep prints safe. For more small-room styling ideas, browse these bathroom wall decor ideas that pair perfectly with a petite gallery.
Quick tips:
- Keep art away from direct shower spray and splashes.
- Choose sealed frames with glass or acrylic fronts in humid bathrooms.
- One mirror inside the cluster doubles light in a windowless bath.
11. Oversized Anchor Above a Headboard
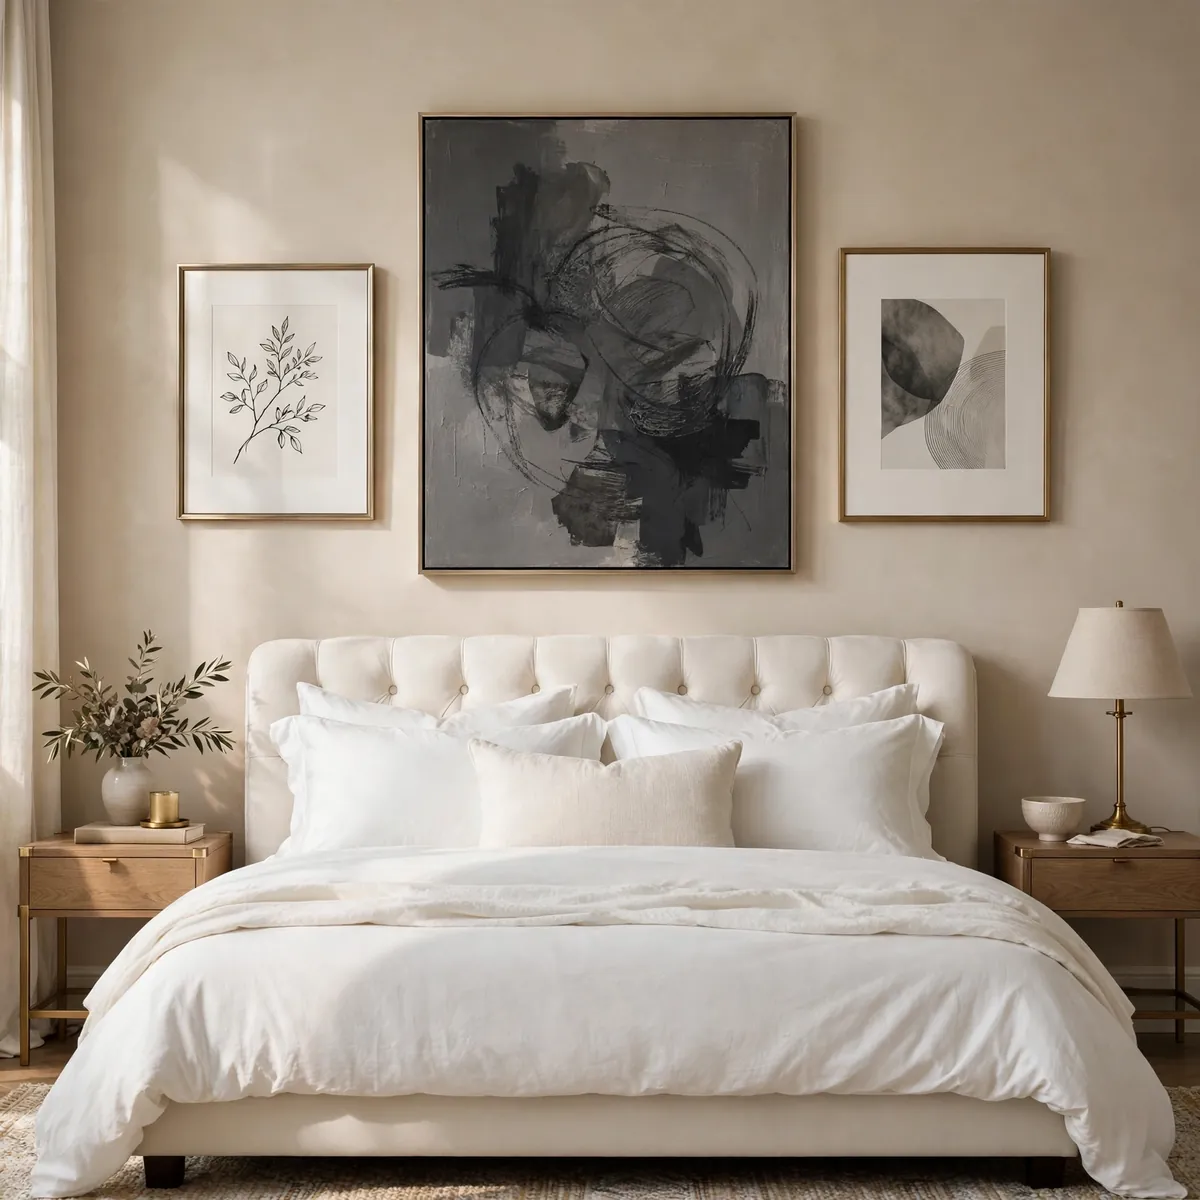
Make the bedroom wall a headboard-height gallery: one 40×30 charcoal abstract centered above the headboard, flanked by two small 8×10 prints in slim brass frames, over ivory upholstered bedding.
In a bedroom, calmer palettes work best — charcoal, ivory, and brass read restful rather than busy. Keep the arrangement’s width slightly narrower than the bed so it feels grounded.
Quick tips:
- Center the arrangement on the bed, not on the wall.
- Hang the bottom of the cluster 6 to 10 inches above the headboard.
- Choose sleepy subjects — abstracts, landscapes, soft florals.
12. Renter-Friendly No-Drill Gallery Wall
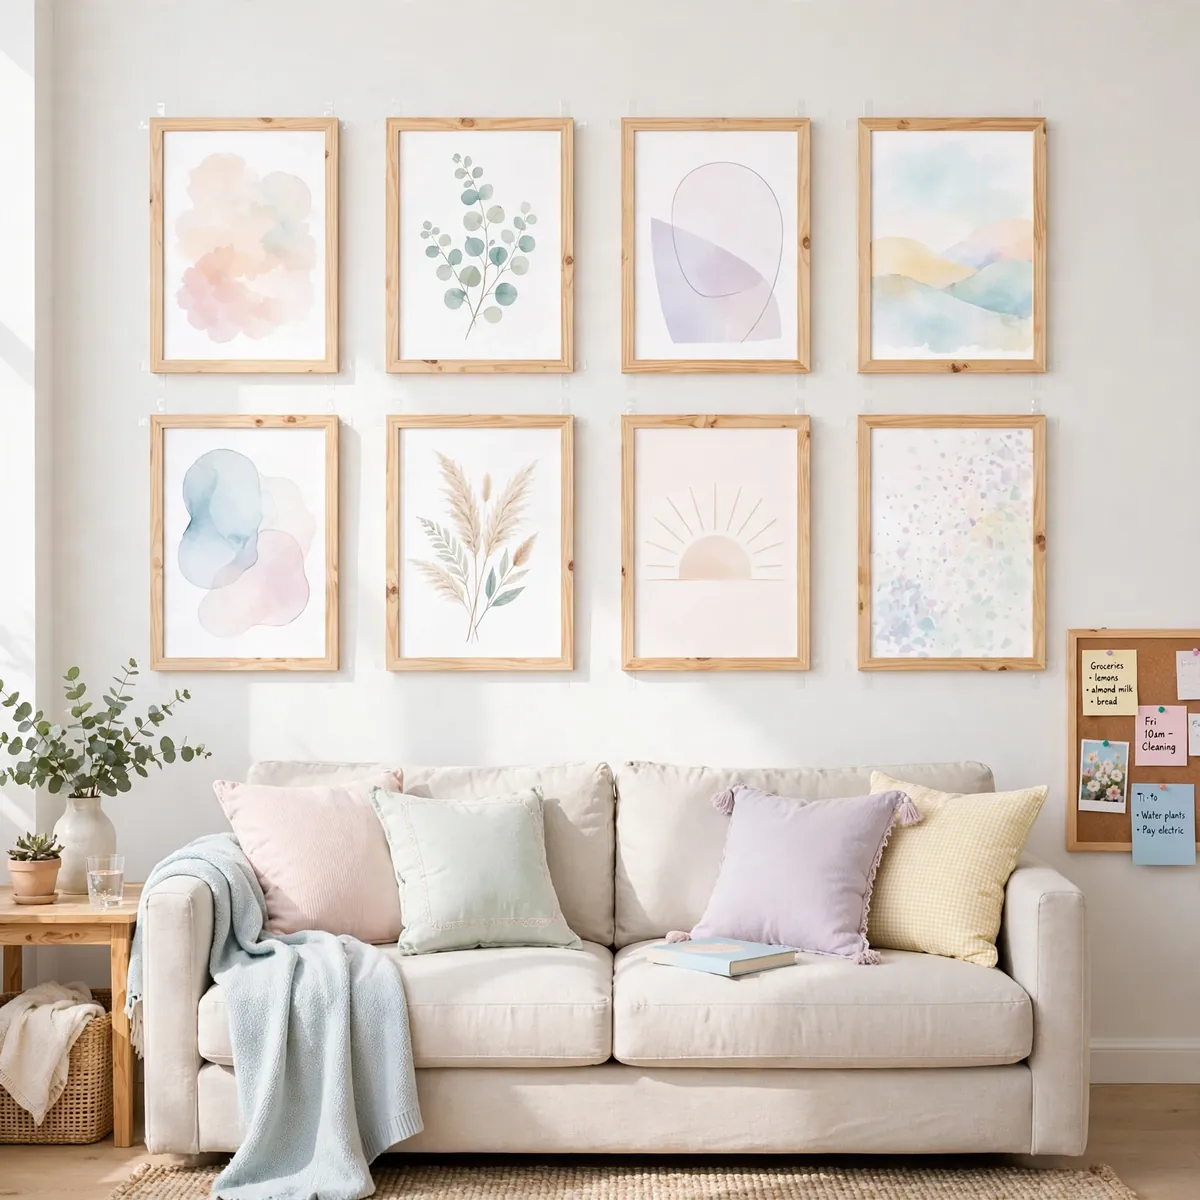
Renters can have gallery walls too: arrange eight pastel art prints in lightweight pine frames using adhesive picture-hanging strips rated for each frame’s weight — no drill, no nails, no patching at move-out.
Adhesive strips hold surprisingly well on clean, smooth walls, and picture ledges screwed into studs… no — skip the screws entirely and use adhesive-mounted ledges for a swap-friendly display.
Quick tips:
- Clean the wall with rubbing alcohol before applying strips for maximum hold.
- Check each strip’s weight rating and use enough strips per frame.
- Remove by pulling the tab straight down along the wall — never outward.
Frequently Asked Questions
How high should a gallery wall be hung?
Center your gallery wall at eye level, about 57 to 60 inches from the floor to the arrangement’s middle. Over furniture, leave 6 to 10 inches between the furniture top and the bottom of the frames so the wall and the piece below read as one vignette.
Do all the frames in a gallery wall need to match?
No. Matching frames are the easiest route to a polished look, but mixed frames work beautifully when one element repeats — the same frame color family, matching mats, or a shared subject or palette across the art.
How do I plan a gallery wall without making holes everywhere?
Cut kraft paper or newspaper templates the size of each frame, tape them to the wall with painter’s tape, and rearrange until you’re happy. Only then start hanging — one confident hole per frame instead of a trial-and-error patchwork.
What size art works best in a gallery wall?
A mix of sizes is what makes gallery walls interesting: pair one or two large pieces (24 inches or more) with medium and small frames. In grids, keep frames identical; in salon or anchor layouts, vary sizes freely but keep spacing consistent.
Conclusion
The best gallery wall ideas start with the layout that fits your wall and end with art you genuinely love — grids for polish, salon clusters for character, ledges for flexibility. Measure once, template with paper, and hang with confidence, and your gallery wall will look like it was designed, not decorated.