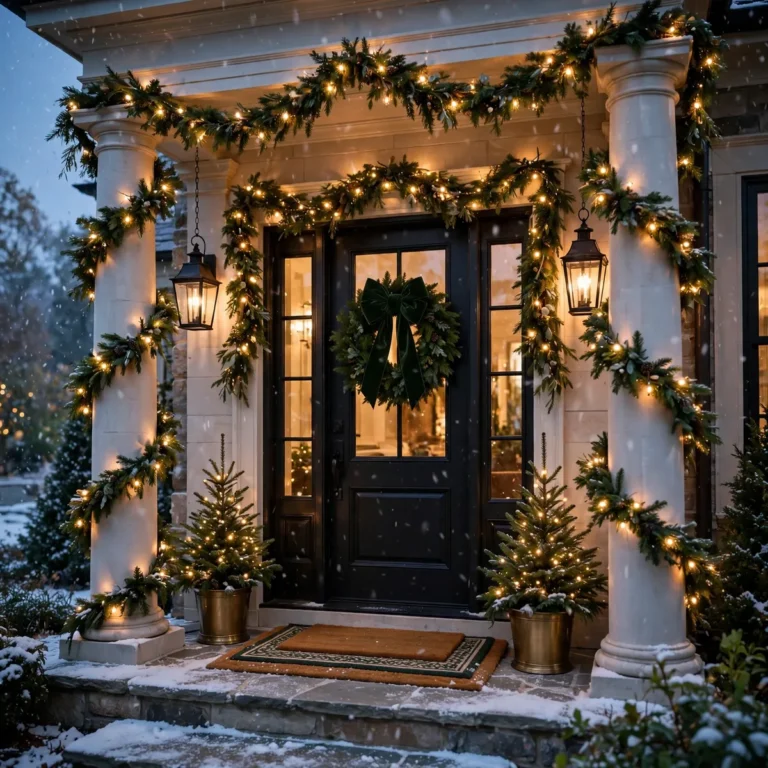
20 Stunning DIY Christmas Centerpieces That Look Pure Bougie ♥ [Table Magic]
Why DIY Christmas Centerpieces Always Steal the Show
A DIY Christmas centerpiece is a handmade holiday table arrangement — built from candles, greenery, and seasonal finds — that anchors the dining table and sets the festive mood. Best of all, your table can look Pinterest-perfect without maxing out a credit card: DIY Christmas centerpieces are budget-friendly, endlessly creative, and give your table a personality no store-bought arrangement ever could.
The designer look comes down to four principles: balance, layering, proportion, and texture. Play with textures — rough pinecones against smooth glass, matte ceramic against gleaming brass. Mix heights, group pieces in odd numbers for natural rhythm, and always add light: candles or fairy lights create instant ambiance nothing else can imitate.
The twenty DIY Christmas centerpieces below follow those very principles, each with a luxe finish that looks far more expensive than it is. Every one takes under an hour and uses easy-to-find materials.
1. Golden Lantern Glow with Pinecones

A black-and-gold lantern makes one of the simplest DIY Christmas centerpieces you will ever style. Fill it with pinecones, tuck dried orange slices between them, and weave warm fairy lights through the arrangement. The texture contrast sells it: matte black metal, gleaming gold, rough bark, glossy citrus — all on a loose bed of eucalyptus.
Quick tips:
- Use battery fairy lights with a timer so the lantern glows every evening on its own.
- Keep everything else on the table low so the lantern commands full attention.
2. Velvet Ribbon Garland Runner

Among DIY Christmas centerpieces, this garland runner is the easiest to build. Let the whole table become the centerpiece. Lay a loose runner of mixed cedar and pine down the center, then thread wide champagne-velvet ribbon through it in soft waves, letting it pool slightly instead of pulling taut. Dot brass taper holders along the runner at uneven intervals, varying candle heights for an effortless layered look.
Quick tips:
- Mist the greenery before guests arrive to keep it fresh through dinner.
- Choose unscented tapers so they never compete with the food.
3. Cranberry and Candle Floating Bowl
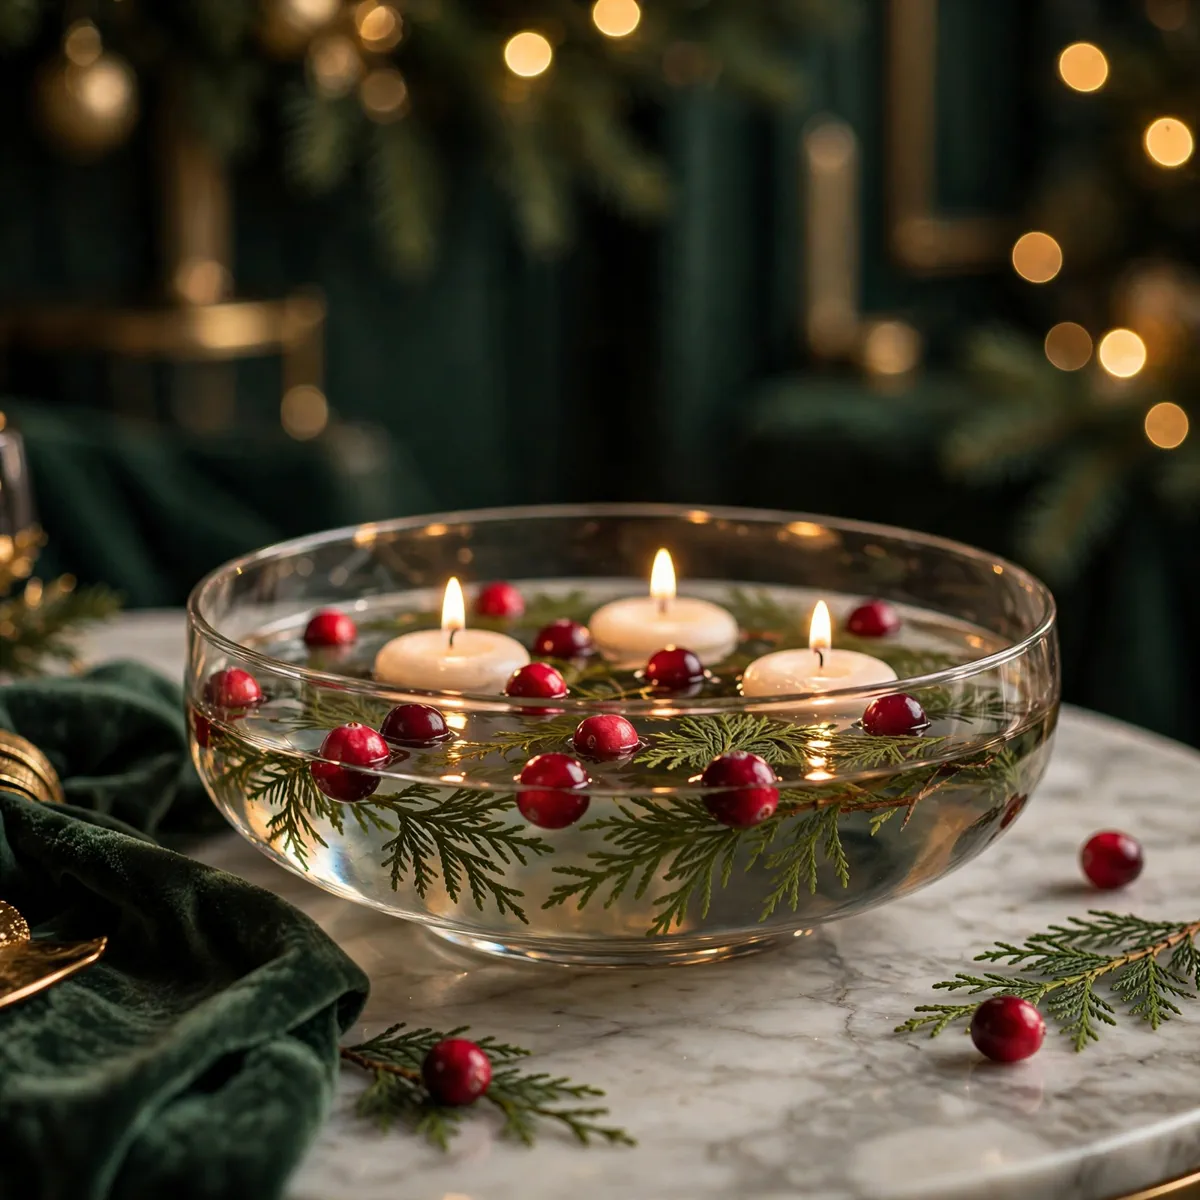
Few DIY Christmas centerpieces deliver this much glow for so little effort: cranberries, cedar sprigs, and floating candles drifting across a bowl of water.
- Fill a wide, low glass bowl two-thirds full with cool water.
- Scatter fresh cranberries and tuck in short cedar sprigs.
- Set three or five floating candles on the surface and light them last.
Quick tips:
- Place the bowl on a mirrored tray to double the candlelight.
- Swap the water the morning of the party so it stays crystal clear.
4. Mason Jar Winter Snow Globes

These glowing jars capture snow-globe charm with none of the water-and-glitter mess. Stand a tiny bottle-brush tree on faux snow inside each mason jar, vary the jar heights for pleasing rhythm, and slide a battery tea light underneath so each scene glows from below. Pure storybook — and one of the most budget-friendly luxe looks here.
Quick tips:
- Use warm-white tea lights; cool white reads icy instead of cozy.
- Sprinkle faux snow around the jars to tie the scene together.
5. Brass Candlesticks with Eucalyptus
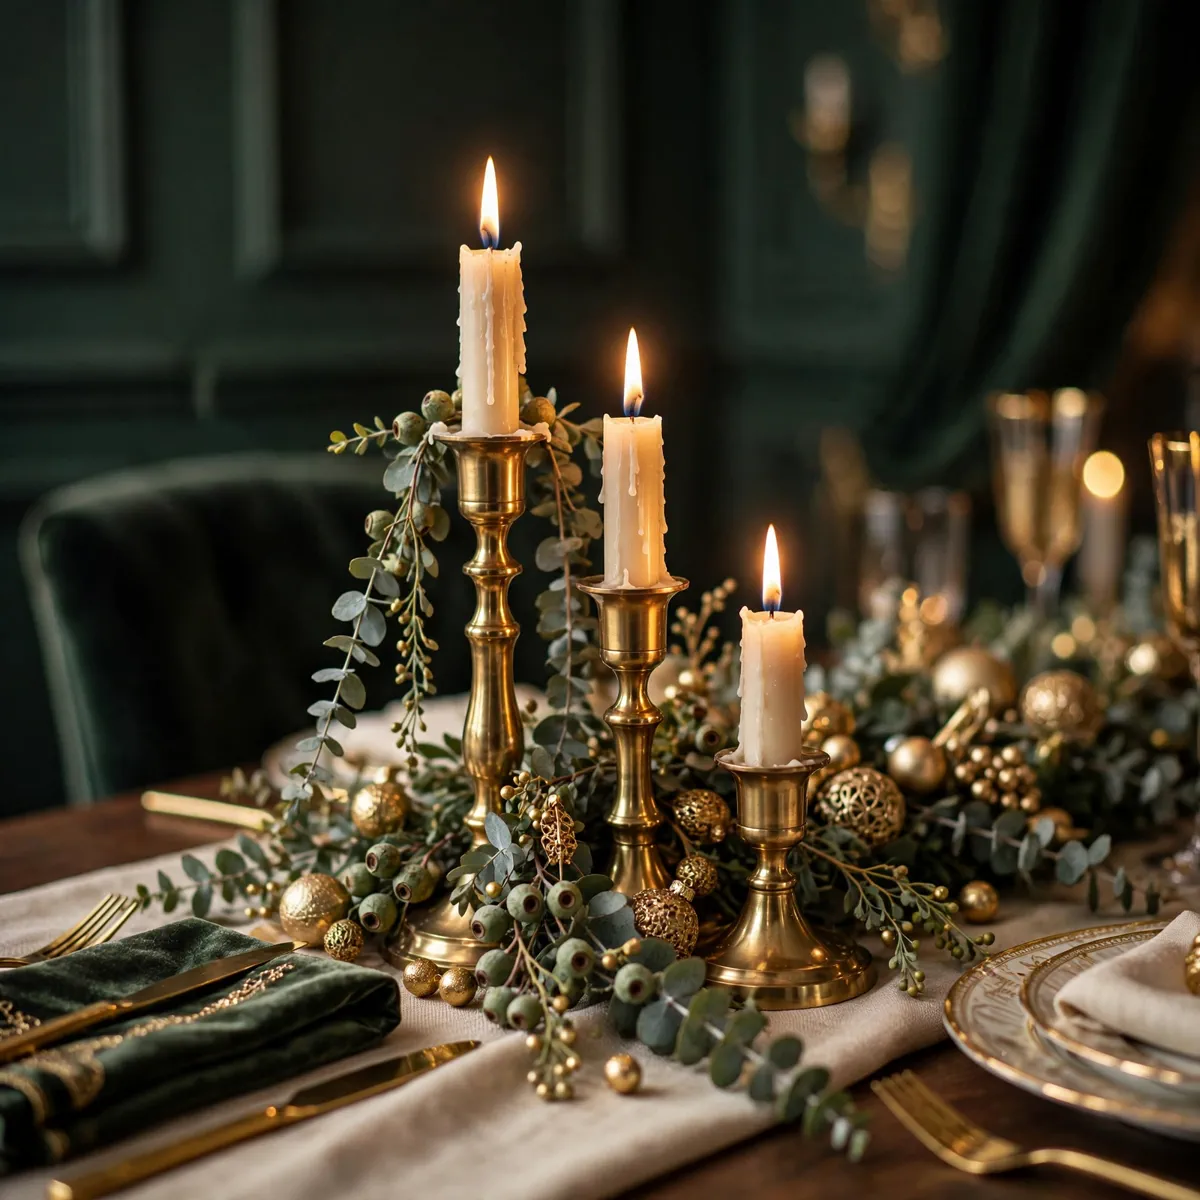
This is one of those DIY Christmas centerpieces that looks straight out of a magazine editorial — yet it is only candlesticks and greenery done well. Cluster mixed-height brass candlesticks in a tight group of three or five, wind trailing seeded eucalyptus around their bases, and nest small gold ornaments among the leaves to catch the candlelight.
Quick tips:
- Flameless tapers give the same glow through a long dinner.
- Anchor the cluster on a small tray so it reads as one vignette.
6. Pinecone Tower in a Glass Vase

A tall glass cylinder turns humble pinecones into sculpture. Stack the largest at the bottom and work up to smaller ones — heavy at the base, lighter at the top — weaving fairy lights through as you go so the tower glows from within. Finish with a plush velvet bow around the vase’s neck.
Quick tips:
- Choose a vase at least twice as tall as wide for a true tower silhouette.
- Dust pinecones with faux snow spray before stacking for a frosted finish.
7. Upside-Down Wine Glass Candles
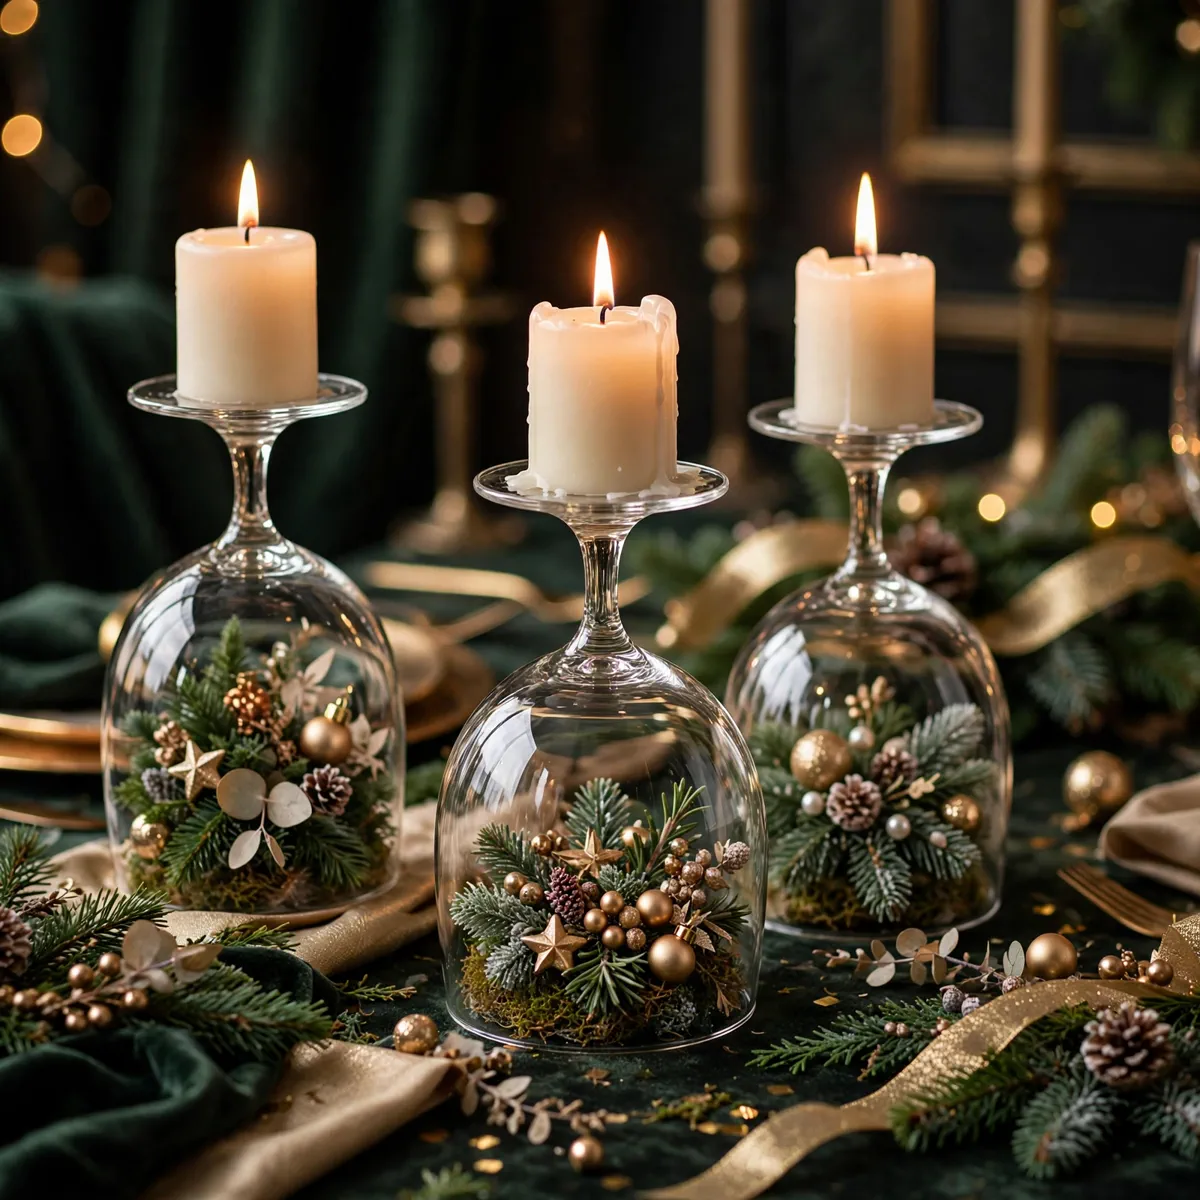
This clever trick traps tiny holiday scenes under glass: invert wine glasses over miniature ornaments and greenery, then perch a pillar candle on each base.
- Arrange mini ornaments, a cedar sprig, and faux snow on a coaster or mirrored tile.
- Invert a wine glass over the arrangement, keeping the rim flat.
- Set a short pillar candle on the base, light it, and repeat in odd numbers.
Quick tips:
- Use wide, flat-based glasses so the pillar sits securely.
- Mix glossy and matte ornament finishes for a richer look.
8. Dried Orange and Cinnamon Garland

One of the most fragrant DIY Christmas centerpieces you can make. String dried orange slices, cinnamon sticks, and star anise onto natural twine, knotting loosely so the strand drapes in a relaxed curve. Lay it over a low wooden board down the table’s center, tucking short pillar candles and pine sprigs between its folds.
Quick tips:
- Leave negative space on the board so the garland feels artful, not crowded.
- Keep candles clear of twine and dried fruit, or use flameless pillars.
9. Silver Mercury Glass Cluster
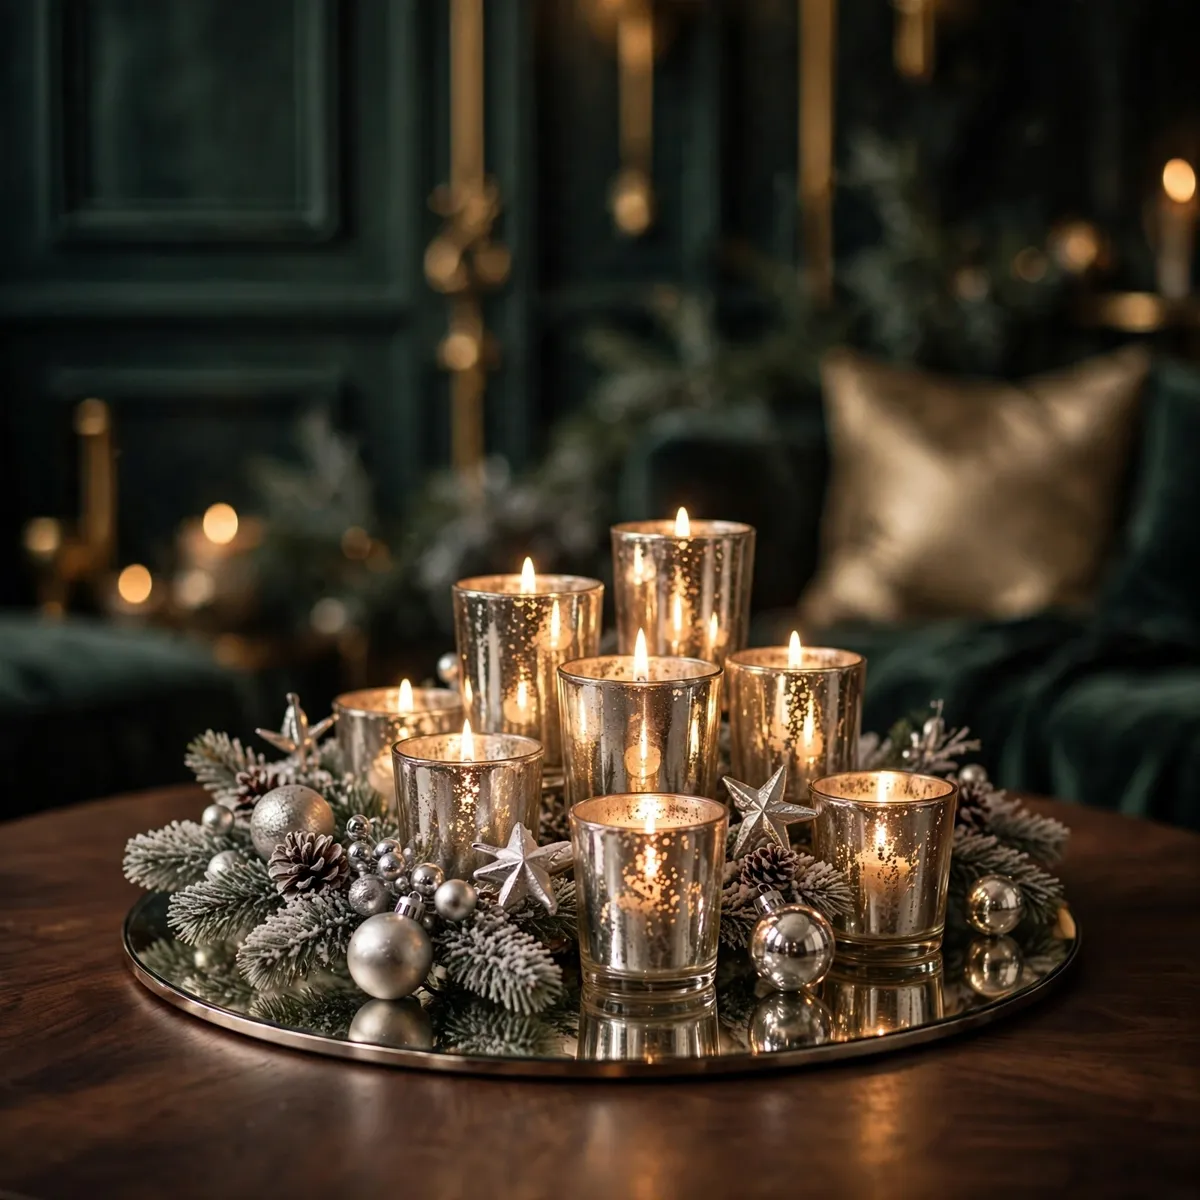
Mercury glass was made for candlelight — its mottled silver surface scatters every flicker into a hundred glints. Gather mixed-size mercury-glass votives on a mirrored tray, weave frosted garland between them, and tuck in small silver and champagne ornaments. Keep the palette tight — silver, champagne, frosted green — for cool, polished festive luxury.
Quick tips:
- A round tray anchors the cluster and lifts off easily for serving.
- Group votives in odd numbers with varied heights for a natural look.
10. Birch Log Candle Holder
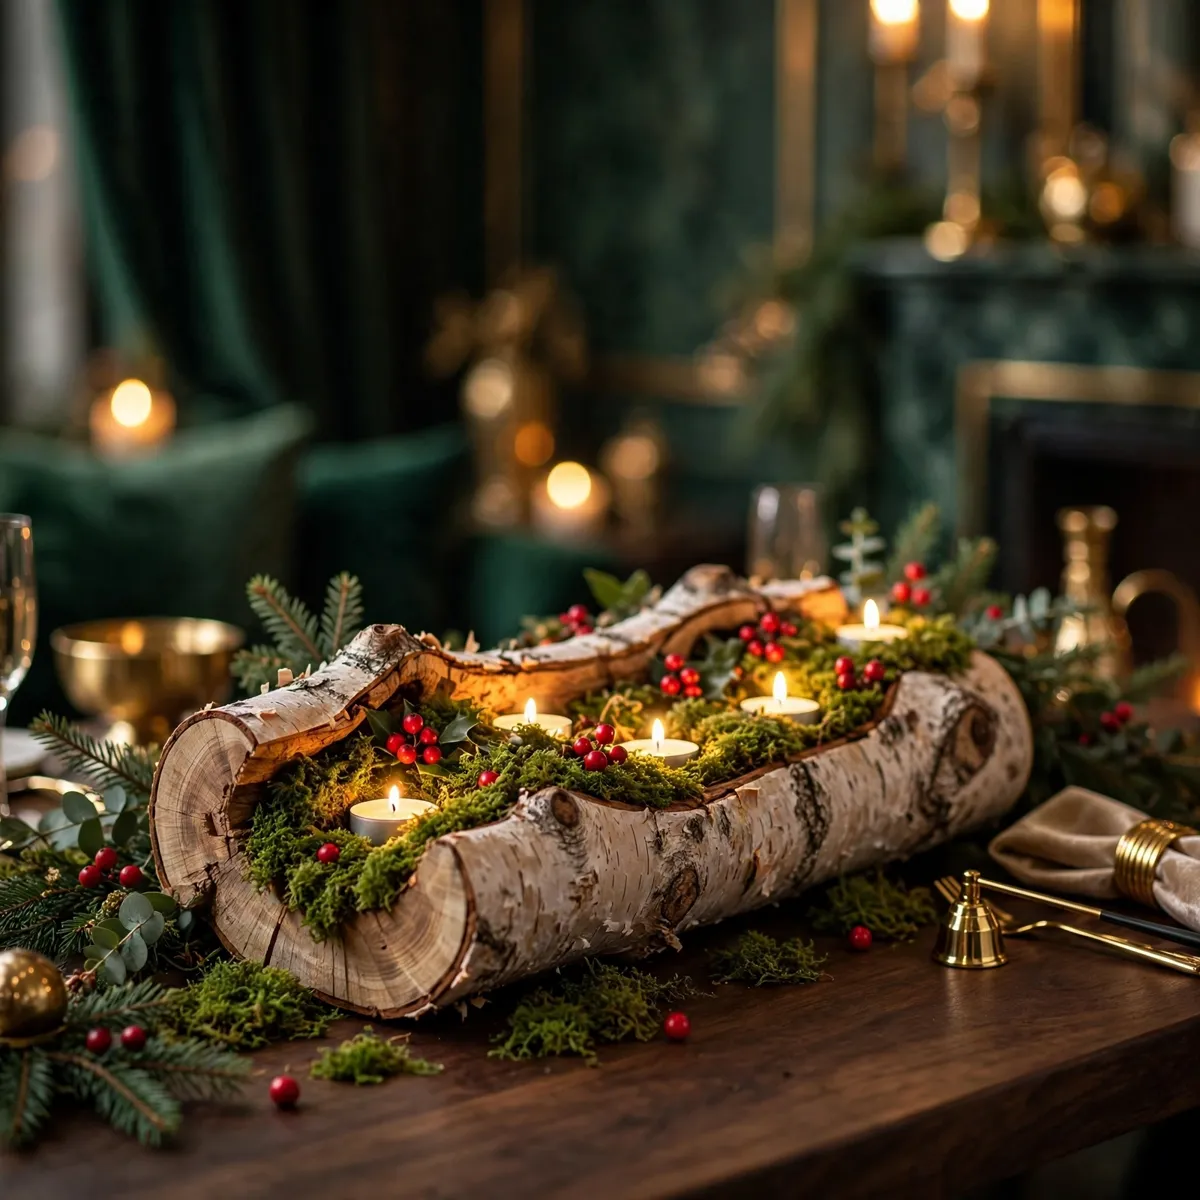
For true woodland-luxe, few DIY Christmas centerpieces beat a hollowed birch log. Fill the channel with tea lights, tuck soft moss around them, and dot the moss with red berries. White birch bark against deep green moss and glossy red berries is a color story straight from a winter forest — rustic, elegant, and fifteen minutes to build.
Quick tips:
- Use LED tea lights — real flames and dry moss are a risky pairing.
- Seal the bark with light matte spray so it does not shed on the cloth.
11. Frosted Wreath Ring with Candles
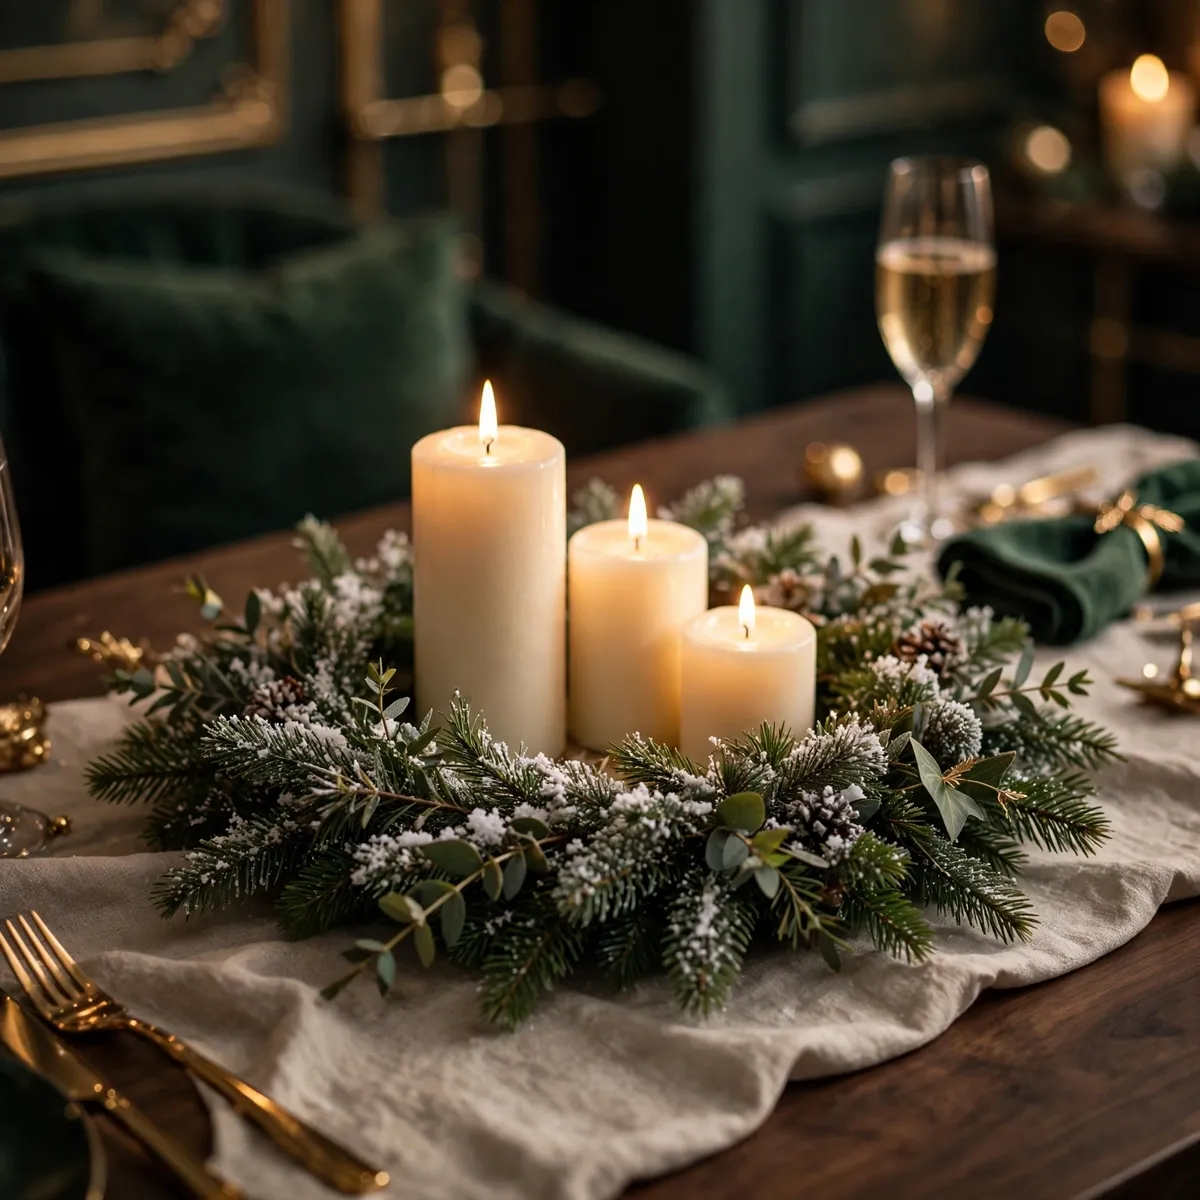
Lay a fresh evergreen wreath flat and it becomes one of the easiest DIY Christmas centerpieces to assemble. Nestle three varied-height pillar candles inside, dust with faux snow, and let the greenery ring frame the glow. Dark green against warm candlelight is pure holiday magic.
Quick tips:
- Group candles in odd numbers at varied heights.
- Tuck pinecones and berry picks into any bare spots.
12. Champagne Bucket with Greenery and Lights
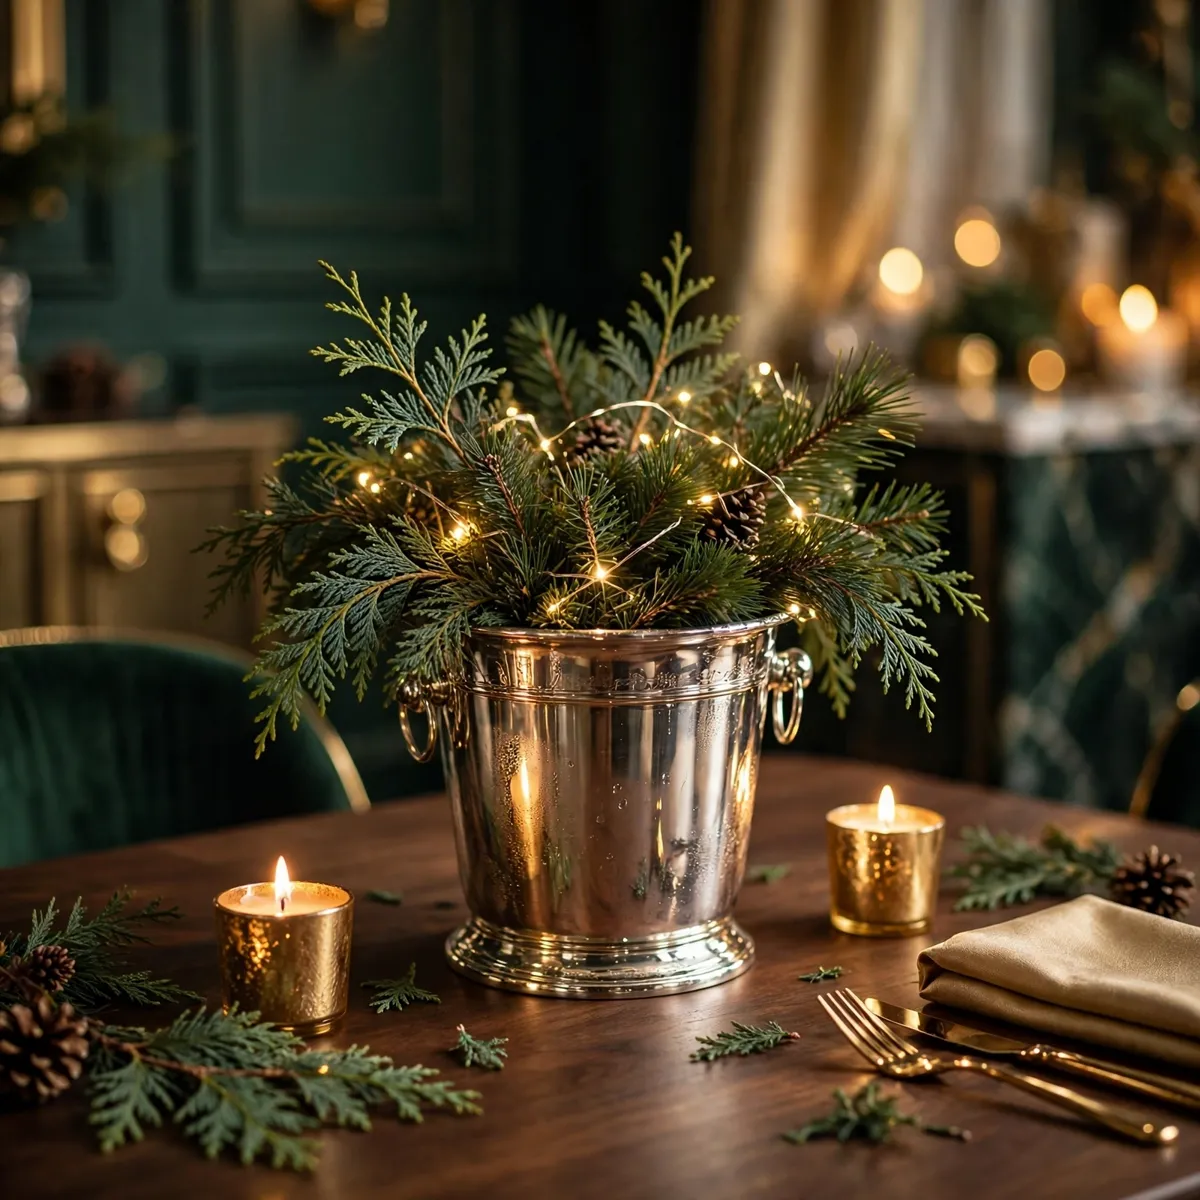
A champagne bucket turns surprisingly chic filled with cedar and pine. Wind battery fairy lights through the greenery so the glow blooms from inside, then flank it with small gold votives. Cool metal against soft foliage is lovely texture contrast, and clipped yard greenery keeps it budget-friendly.
Quick tips:
- Set the lights on a timer for an effortless evening glow.
- Keep the palette tight — metallic, green, candlelight.
13. Gilded Walnut and Fig Bowl

A brass bowl, walnuts, and gold spray paint are all this jewel needs. Metallic gloss against matte dried fruit is a masterclass in texture contrast, and it pairs beautifully with these elegant dining room ideas for a special dinner. These DIY Christmas centerpieces prove luxury comes from layering, not spending.
- Spread walnuts on newspaper; spray gold, flip, and coat again once dry.
- Fill the brass bowl with a loose greenery base so nuts and figs sit above the rim.
- Arrange walnuts in groups of three, then tuck in dried figs and sprigs.
- Finish with whole cloves or a dusting of faux snow.
Quick tips:
- Spray outdoors; let walnuts cure overnight to lose the paint smell.
- Keep dried figs away from open flames — this one is candle-free.
14. Oversized Paper Star Lanterns
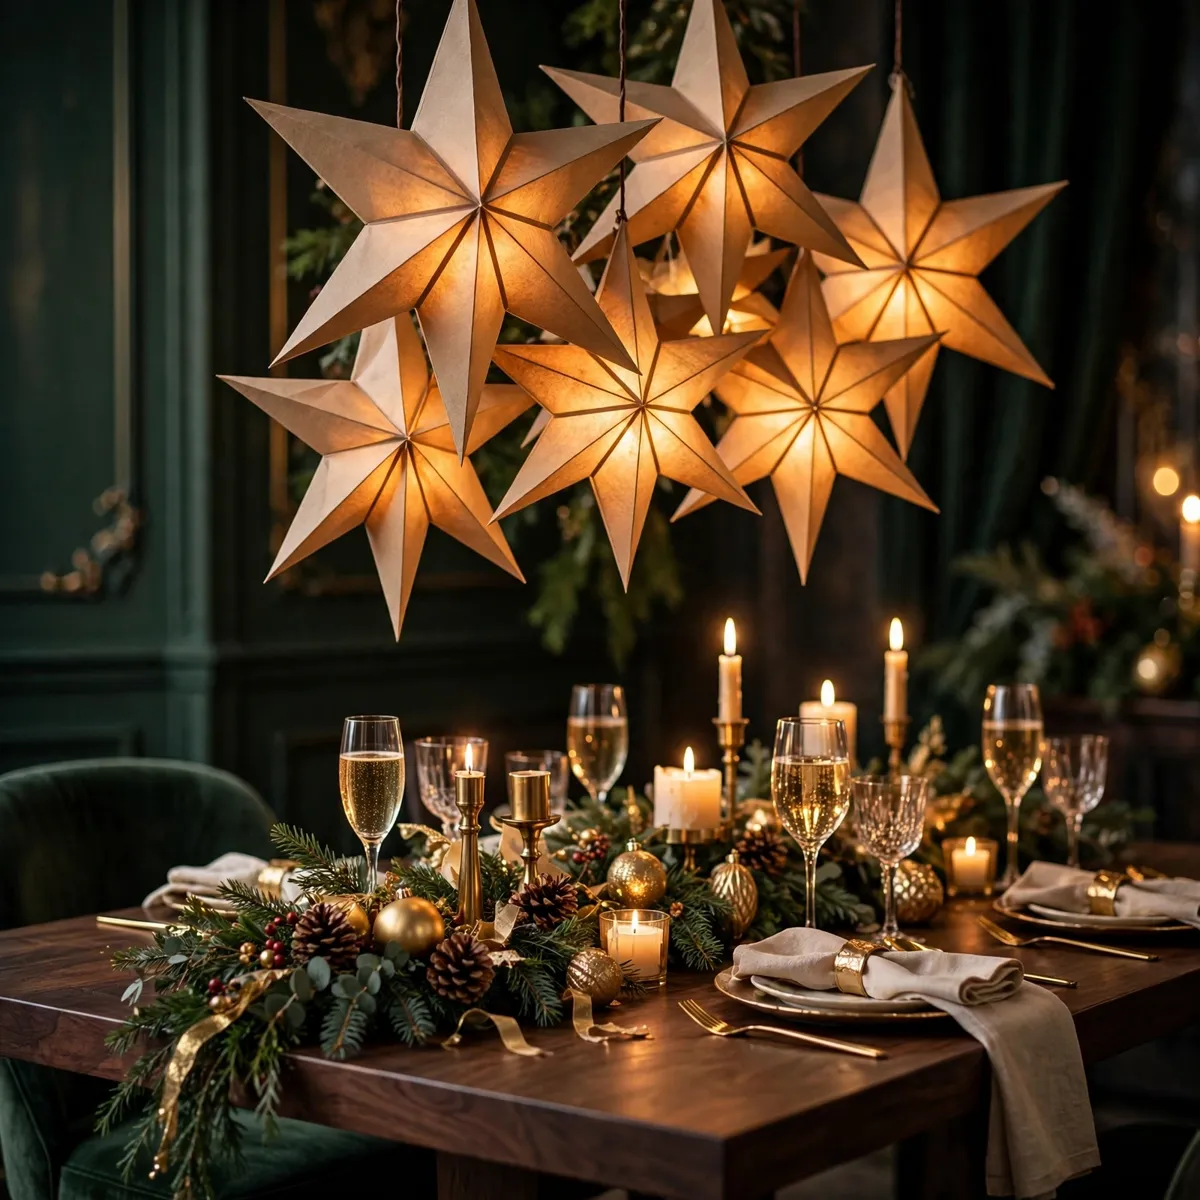
Big kraft-paper star lanterns bring instant drama, hung low above the table or clustered on the runner. A warm LED inside each star turns the paper translucent, glowing like a storybook lantern. Few DIY Christmas centerpieces glow this softly for this little money. Mix two sizes for pleasing rhythm and keep everything else low.
Quick tips:
- Use only cool LEDs inside paper stars — never real candles.
- Hang at staggered heights so the cluster feels layered.
15. Apothecary Jars with Layered Ornaments

Start with three glass apothecary jars in graduated heights and build each like a snow globe in layers. Lay a thick base of faux snow first, then ring it with small gold and champagne ornaments. Push upright pine sprigs through the layers like tiny trees, and finish with mercury-glass balls near the top to catch the light.
Set the trio down the middle of the table a few inches apart so each reads as its own vignette. You now have one of those rare DIY Christmas centerpieces with real height and no candles at all. That makes it perfect for homes with curious little hands or a long season where you want beauty for weeks without maintenance.
Glossy ornament finishes against soft snow and matte glass create gorgeous texture variation. With the palette held to gold, champagne, and green, the grouping looks pulled together from ornaments you probably already own. That is the heart of budget-friendly decorating: richness through layering and proportion, not spending. Tuck a battery fairy-light strand around the jars just before guests arrive, and the glow through the glass makes the whole grouping feel lit from within.
Quick tips:
- Odd numbers of jars look best; leave breathing room between each.
- Layer heaviest ornaments at the bottom so sprigs stay upright.
16. Rustic Wooden Trough with Pillars

A reclaimed-wood trough is a forgiving base for DIY Christmas centerpieces because the box does the anchoring. Arrange ivory pillars down the center at staggered heights, then pack pine, red berries, and pinecones around them. Rough wood against smooth wax and glossy berries gives texture contrast effortlessly.
Quick tips:
- Choose flameless pillars near sleeves and serving dishes.
- Refresh the pine weekly to keep it looking alive.
17. Pomegranate and Fig Garland Runner

Halved pomegranates and figs spilling down a linen runner with eucalyptus woven between make a jewel-toned feast. Cut fruit glows ruby in candlelight while silvery eucalyptus keeps it from feeling heavy. Tuck low votives into the garland and keep everything below eye level.
Quick tips:
- Build the morning of your dinner — cut fruit lasts about a day.
- Blot cut pomegranates to protect a light-colored runner.
18. Snowy Branches Under a Glass Cloche
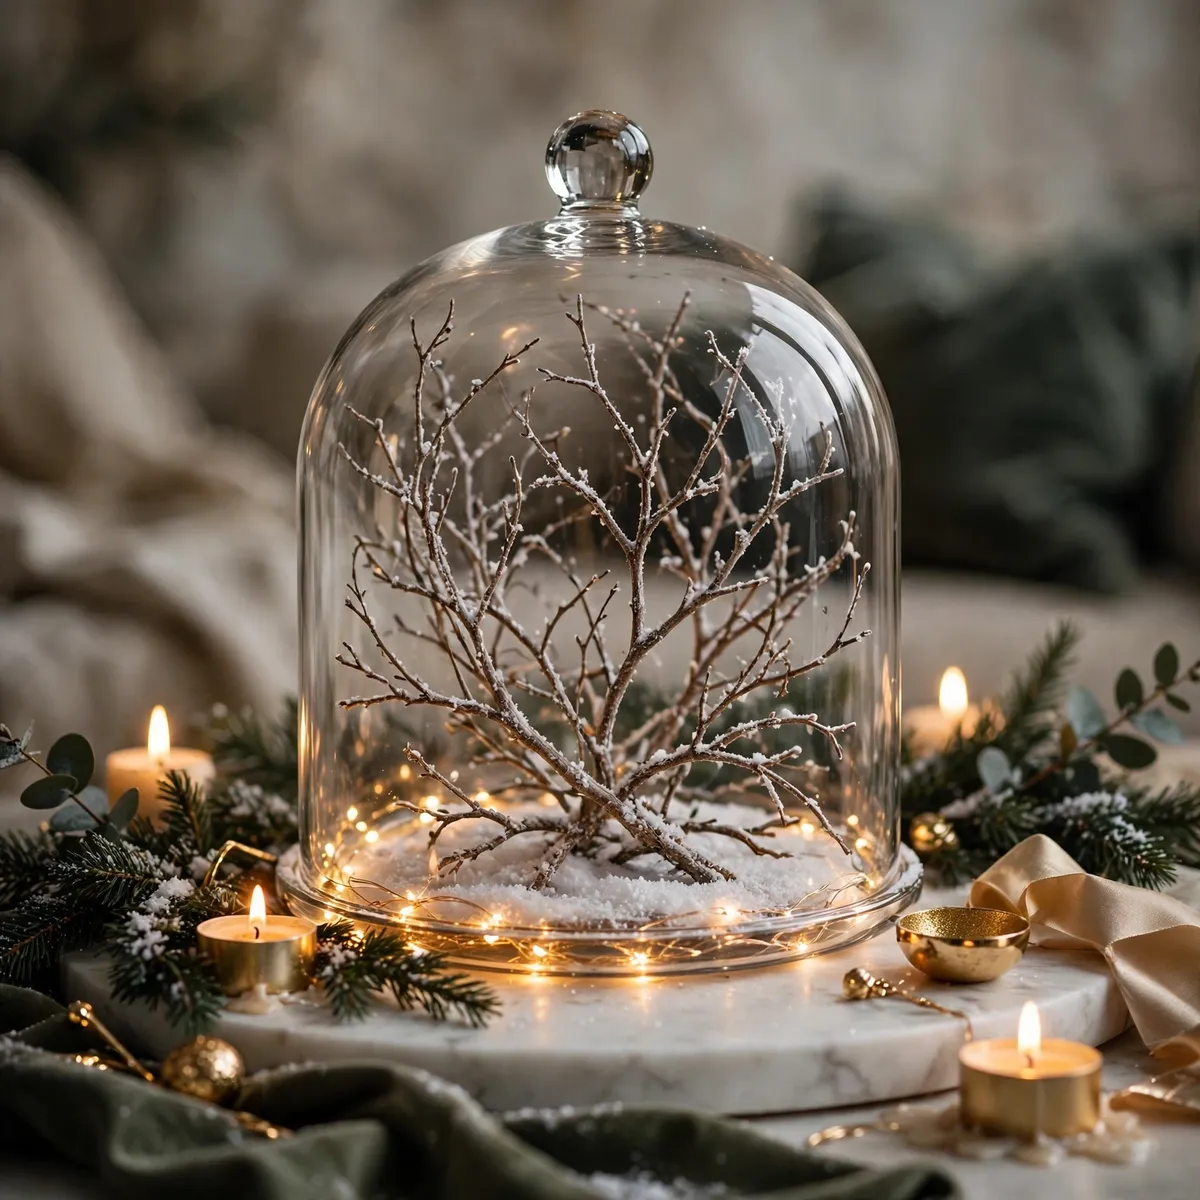
Some of the most striking DIY Christmas centerpieces are also the simplest: bare branches dusted with faux snow under a big glass cloche. Set it on a marble slab, coil fairy lights around the branch bases, and the light sparkles through glass like morning sun on frost. Sculptural, nearly free, done in ten minutes.
Quick tips:
- Trim branches to fit with an inch to spare at the top.
- A marble or dark wood slab grounds the display and protects the table.
19. Tiered Tray Holiday Village
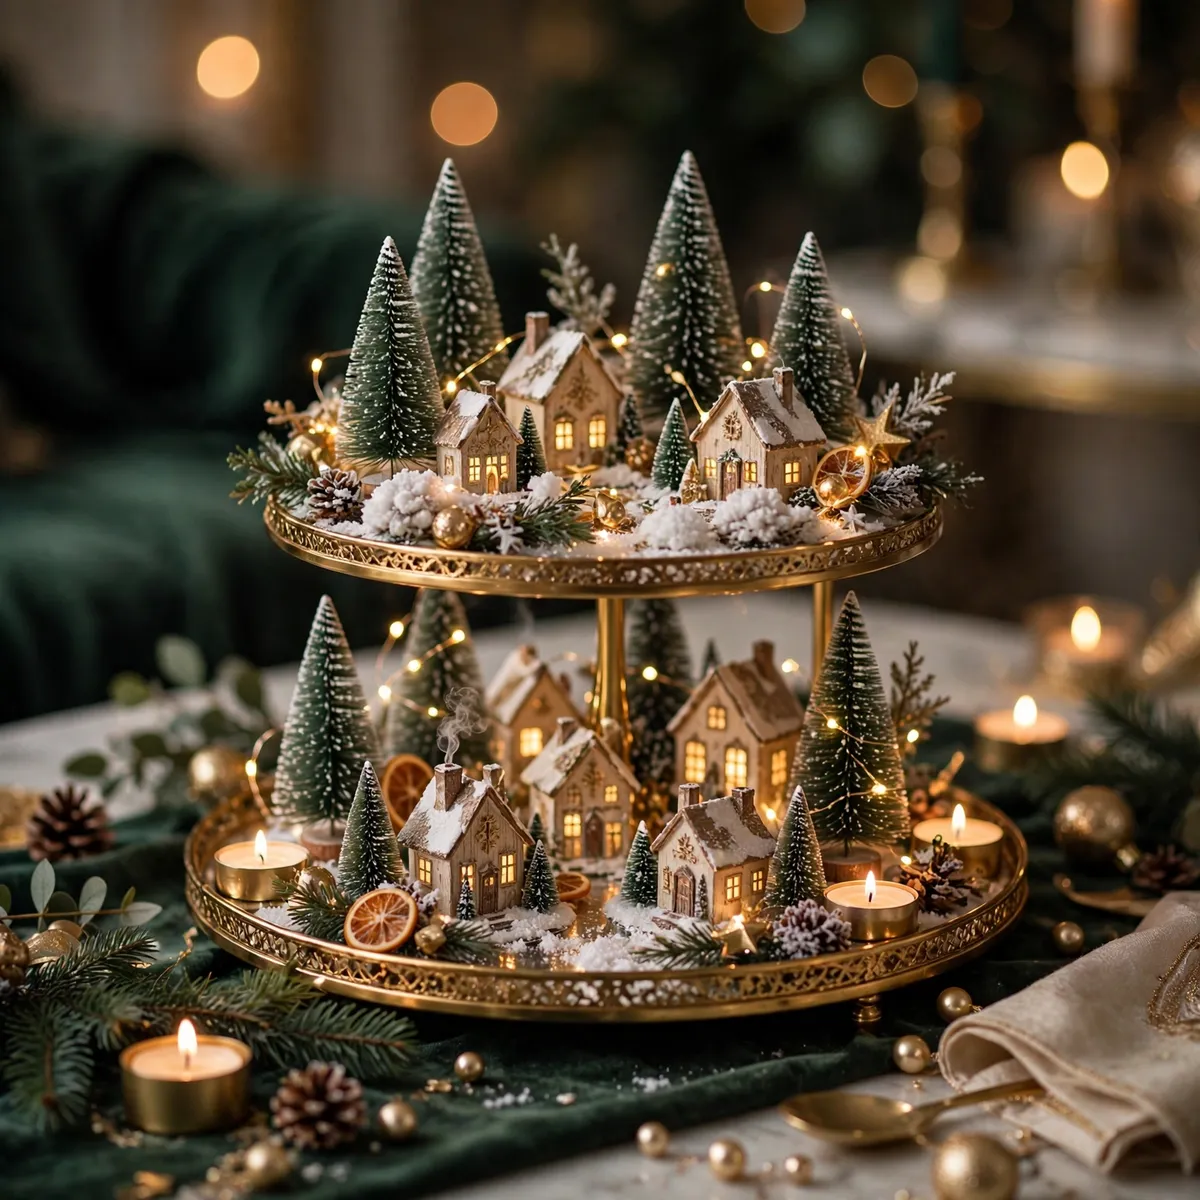
This is one of the most storytelling-driven DIY Christmas centerpieces you can make. A two-tier tray becomes a miniature village with snow-dusted bottle-brush trees, tiny ceramic houses, a deer figurine or two, and a drift of faux snow. Think in triangles — tallest at the back of each tier, smallest at the front — and dot micro lights through the trees. The tray keeps it contained, never cluttered.
Quick tips:
- Mix real sprigs for scent with faux trees that hold their shape.
- Stick to one or two accent colors so it feels curated.
20. Candlelit Mirror Tray with Scattered Ornaments
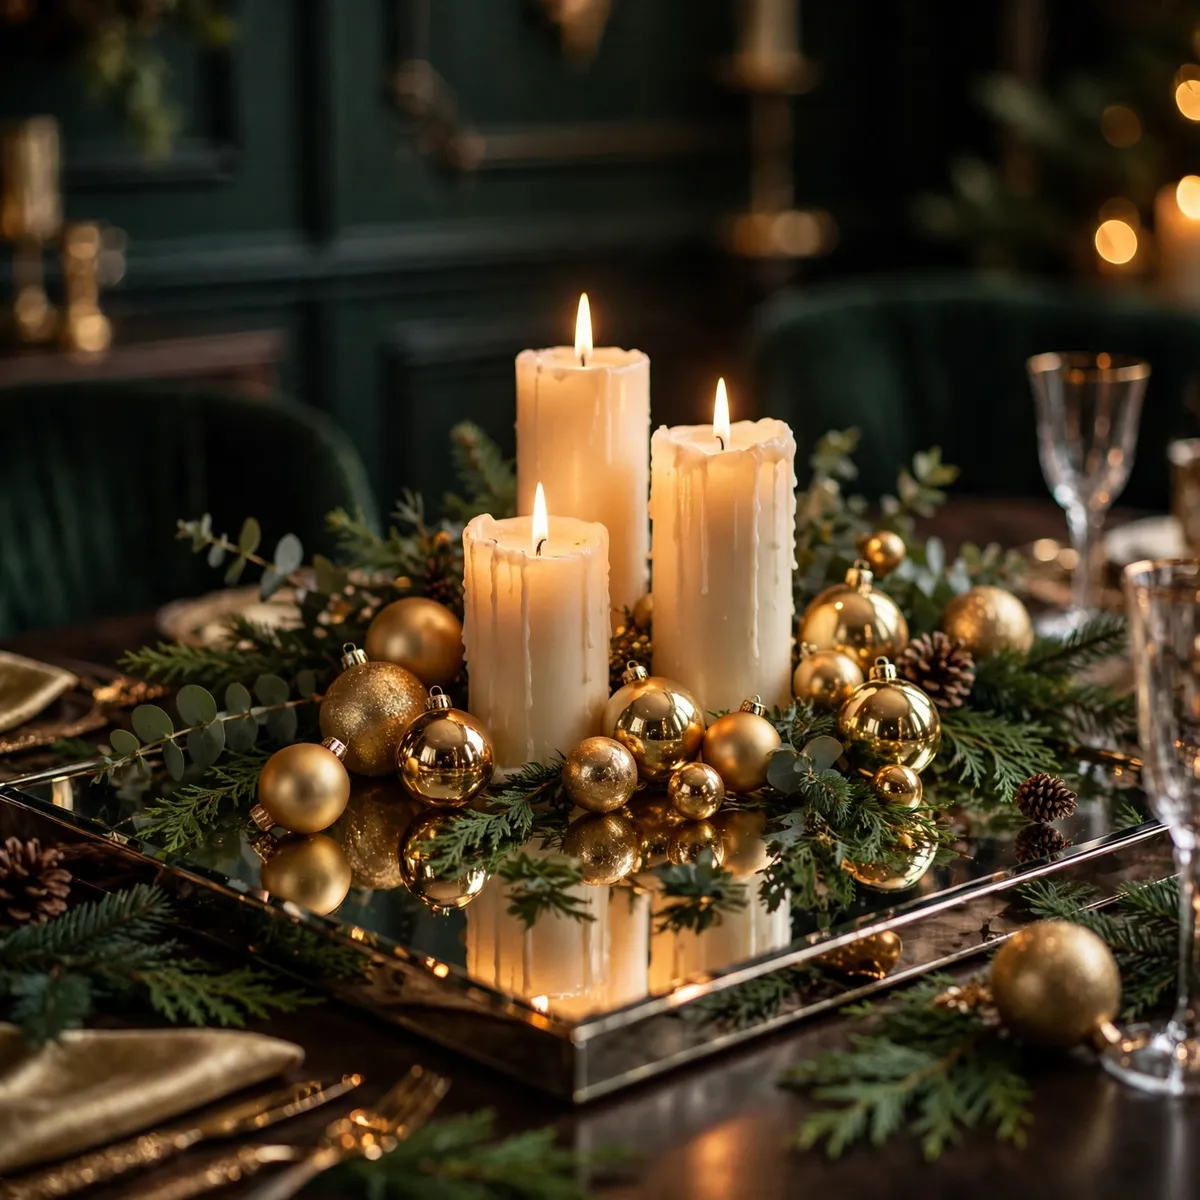
A large mirrored tray does half the decorating, doubling every flame and ornament. Cluster mixed-height pillars in the center, scatter gold ornaments around them, and tuck loose greenery into the gaps. These DIY Christmas centerpieces reward restraint — gold, green, and candlelight bouncing across the mirror for a glow bigger than its footprint.
Quick tips:
- Wipe the mirror with glass cleaner before guests arrive.
- Let ornaments overlap the tray’s edge for an abundant feel.
DIY Christmas Centerpieces: Your Questions Answered
How tall should a Christmas centerpiece be?
Keep it at or below 12 inches so guests can talk over it. Taller pieces suit buffets or consoles where nobody needs to see past them.
What is the cheapest way to make a Christmas centerpiece look expensive?
Limit your palette to three tones — green, gold, natural wood — because restraint reads as luxury. Add light: fairy lights or candles multiply the richness of even simple greenery.
How do I keep a fresh-greenery centerpiece from drying out?
Mist every day or two and keep it away from heating vents. Cedar, pine, and magnolia leaves stay fresh for weeks.
Can I leave candles lit in a centerpiece during dinner?
Yes, if flames sit well clear of greenery, fruit, and paper, and someone is always at the table. Flameless candles give the same glow with zero worry.
The Table Is Yours
Whether you reach for gilded walnuts, snowy branches under glass, or a tiny village on a tray, the loveliest tables carry your fingerprints. Pick the idea that made you smile and build it your way.
Light the candles, pour something warm, and enjoy the glow — these DIY Christmas centerpieces were made to be lived with, not just looked at.